Scratch-building ship’s boats
Introduction
One of the big challenges facing scratch-builders is making realistic ships boats. In this blog post, I’ll run through a traditional technique I learnt many years ago before the days of 3D printers, namely tissue core boats.
Papier-Mache is often overlooked as a building material which is a great shame as it has many advantages.
Notably:
It is more or less free;
It is simple to use;
It produces quite strong shapes;
It can be easily combined with thin plywood and card to make robust shells that can be sanded and painted.
Typical uses includes canvas dodgers, awnings, boat covers and of course, the boats themselves
The following describes the process for clinker-build boats, but carvel boats are just simpler as they have no planking to reproduce.
Method
Like all scratch-building, information is key. Ship’s boat lines are rare to find on plan sets. Harold Underwood, a wonderful ship’s draughtsman produced some great boat drawings that can still be purchased from Brown, Son and Ferguson, see link on my directory. Without this, similar boat lines can be modified to fit the plan and elevation drawing shown on the plan, it just takes time and patience.
With the lines sorted, a male mould is constructed on a flat board in wood. This can be achieved with sections infilled with balsa and sanded back, or horizonal slices stacked up as shown below
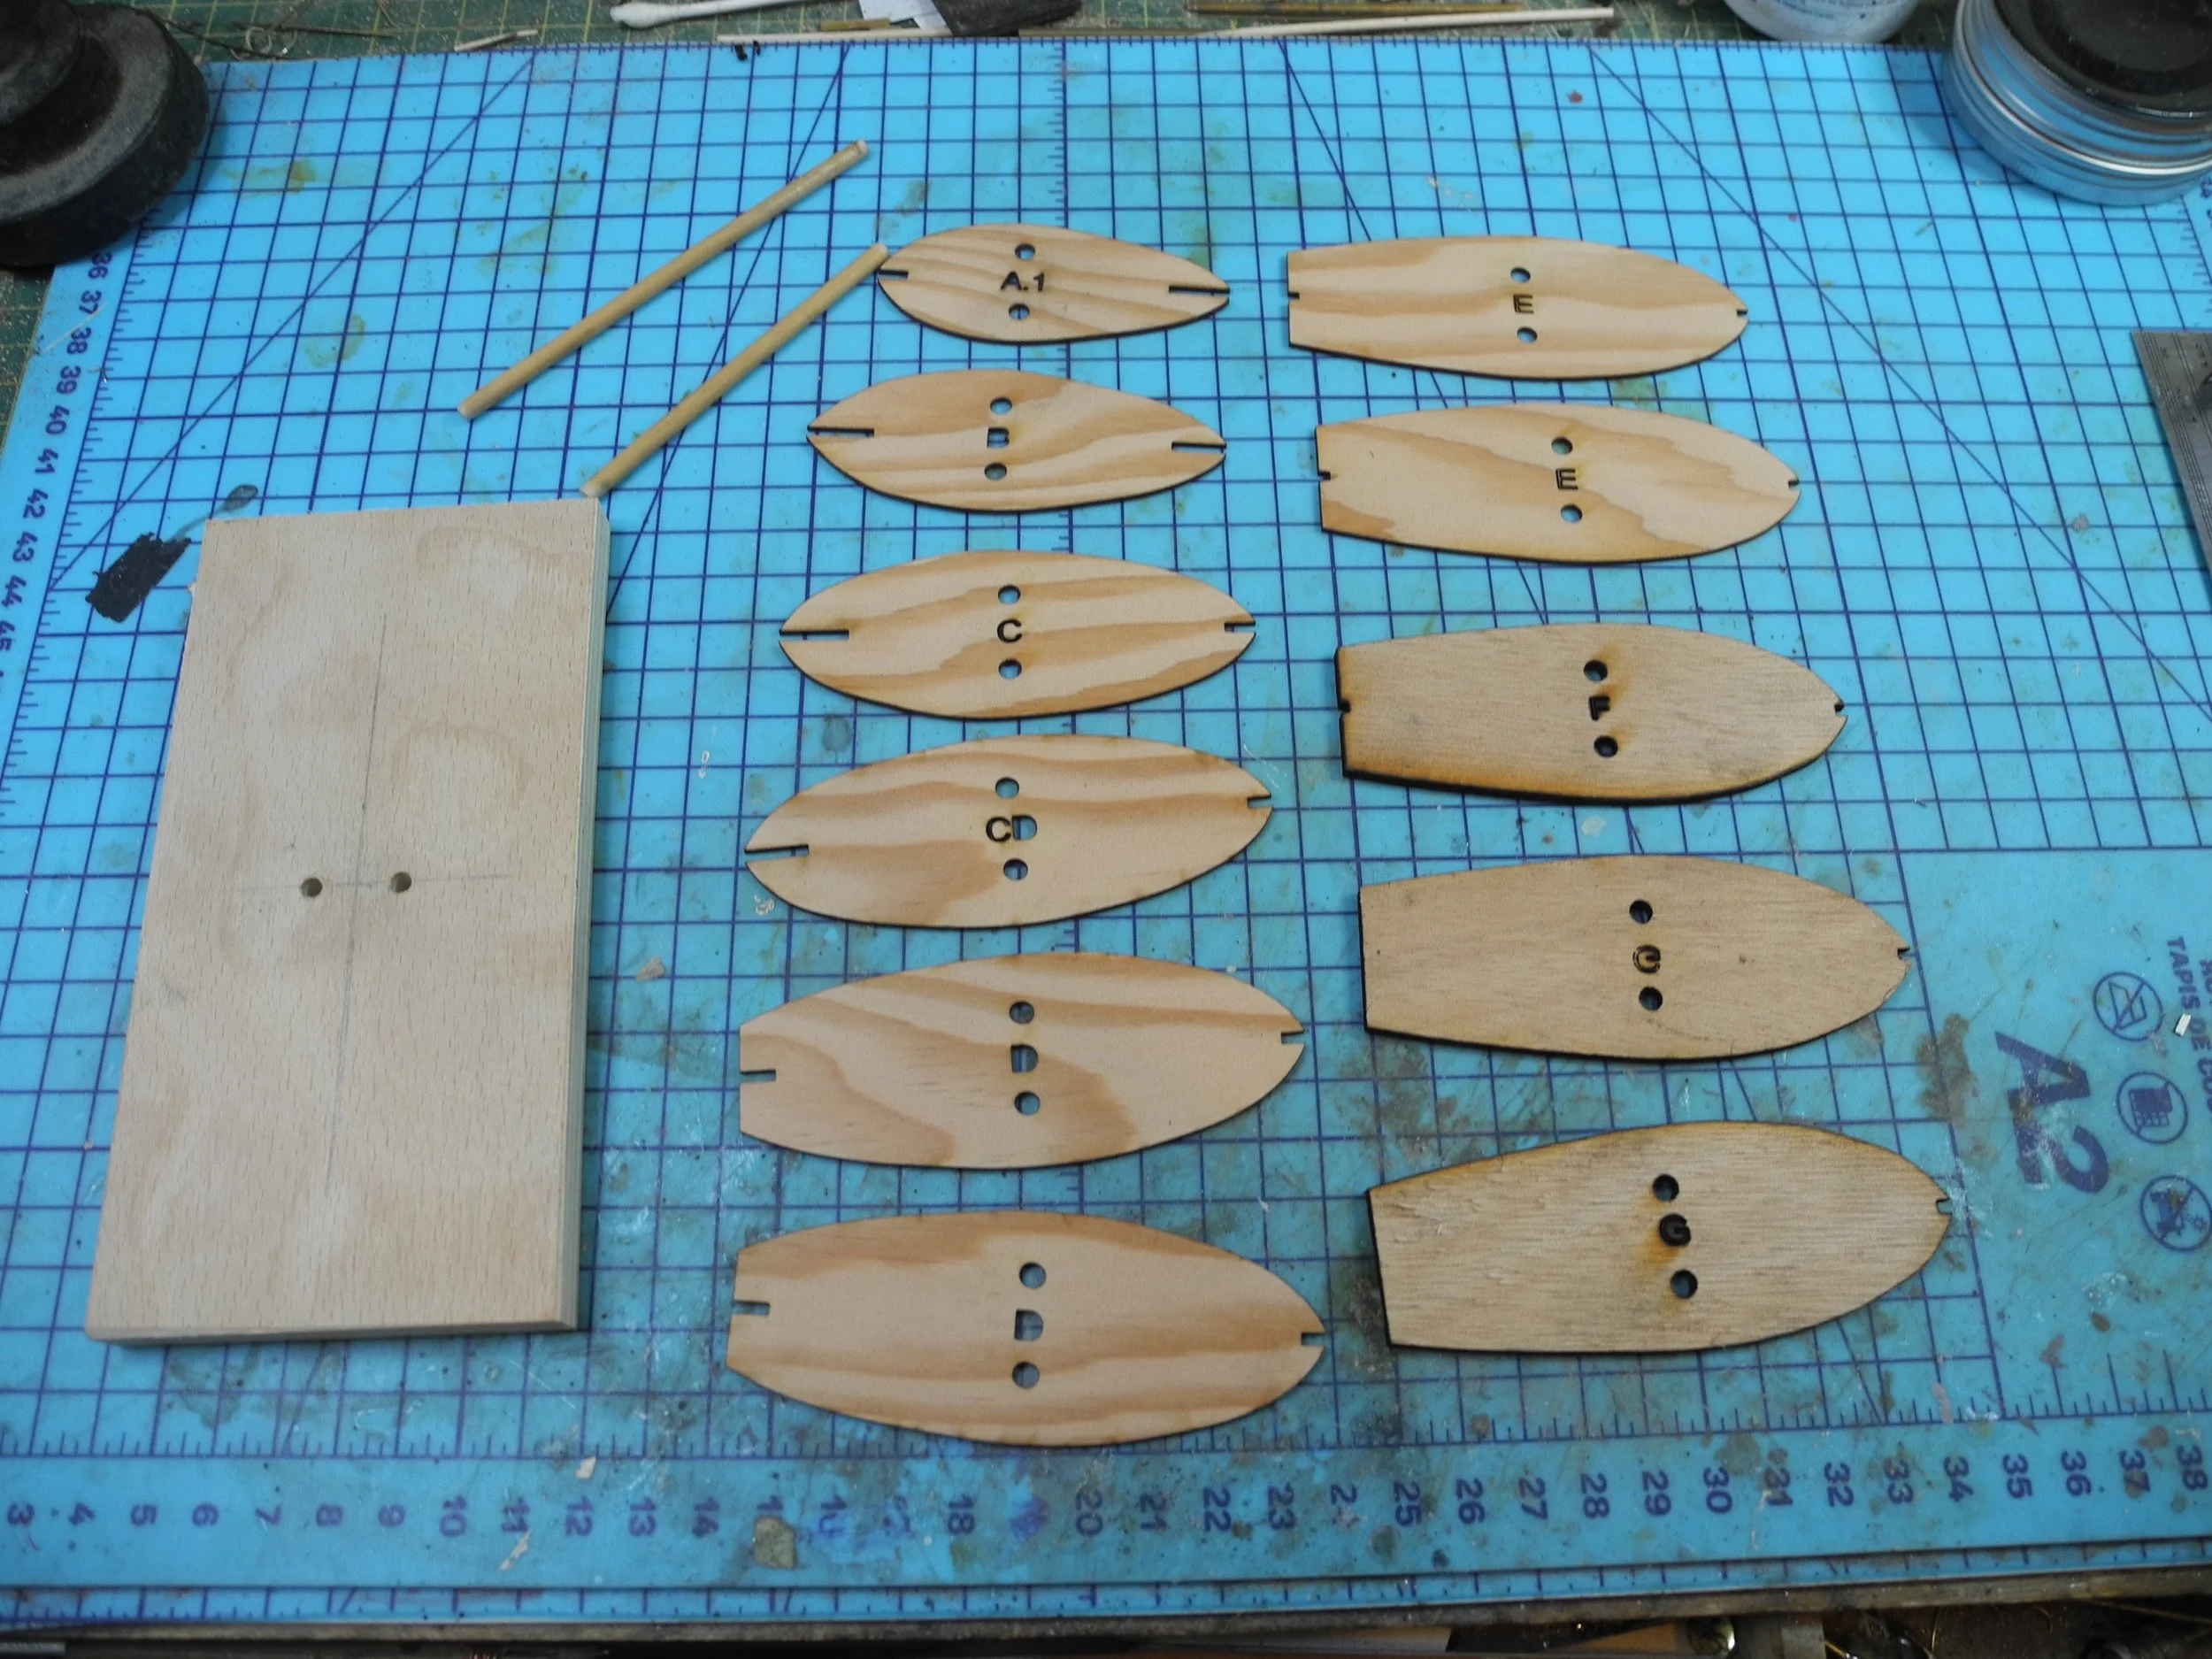
Horizontal section based mould cut from 1.5mm thick spruce
This is glued up, the holes provide perfect alignment using 5mm dowels
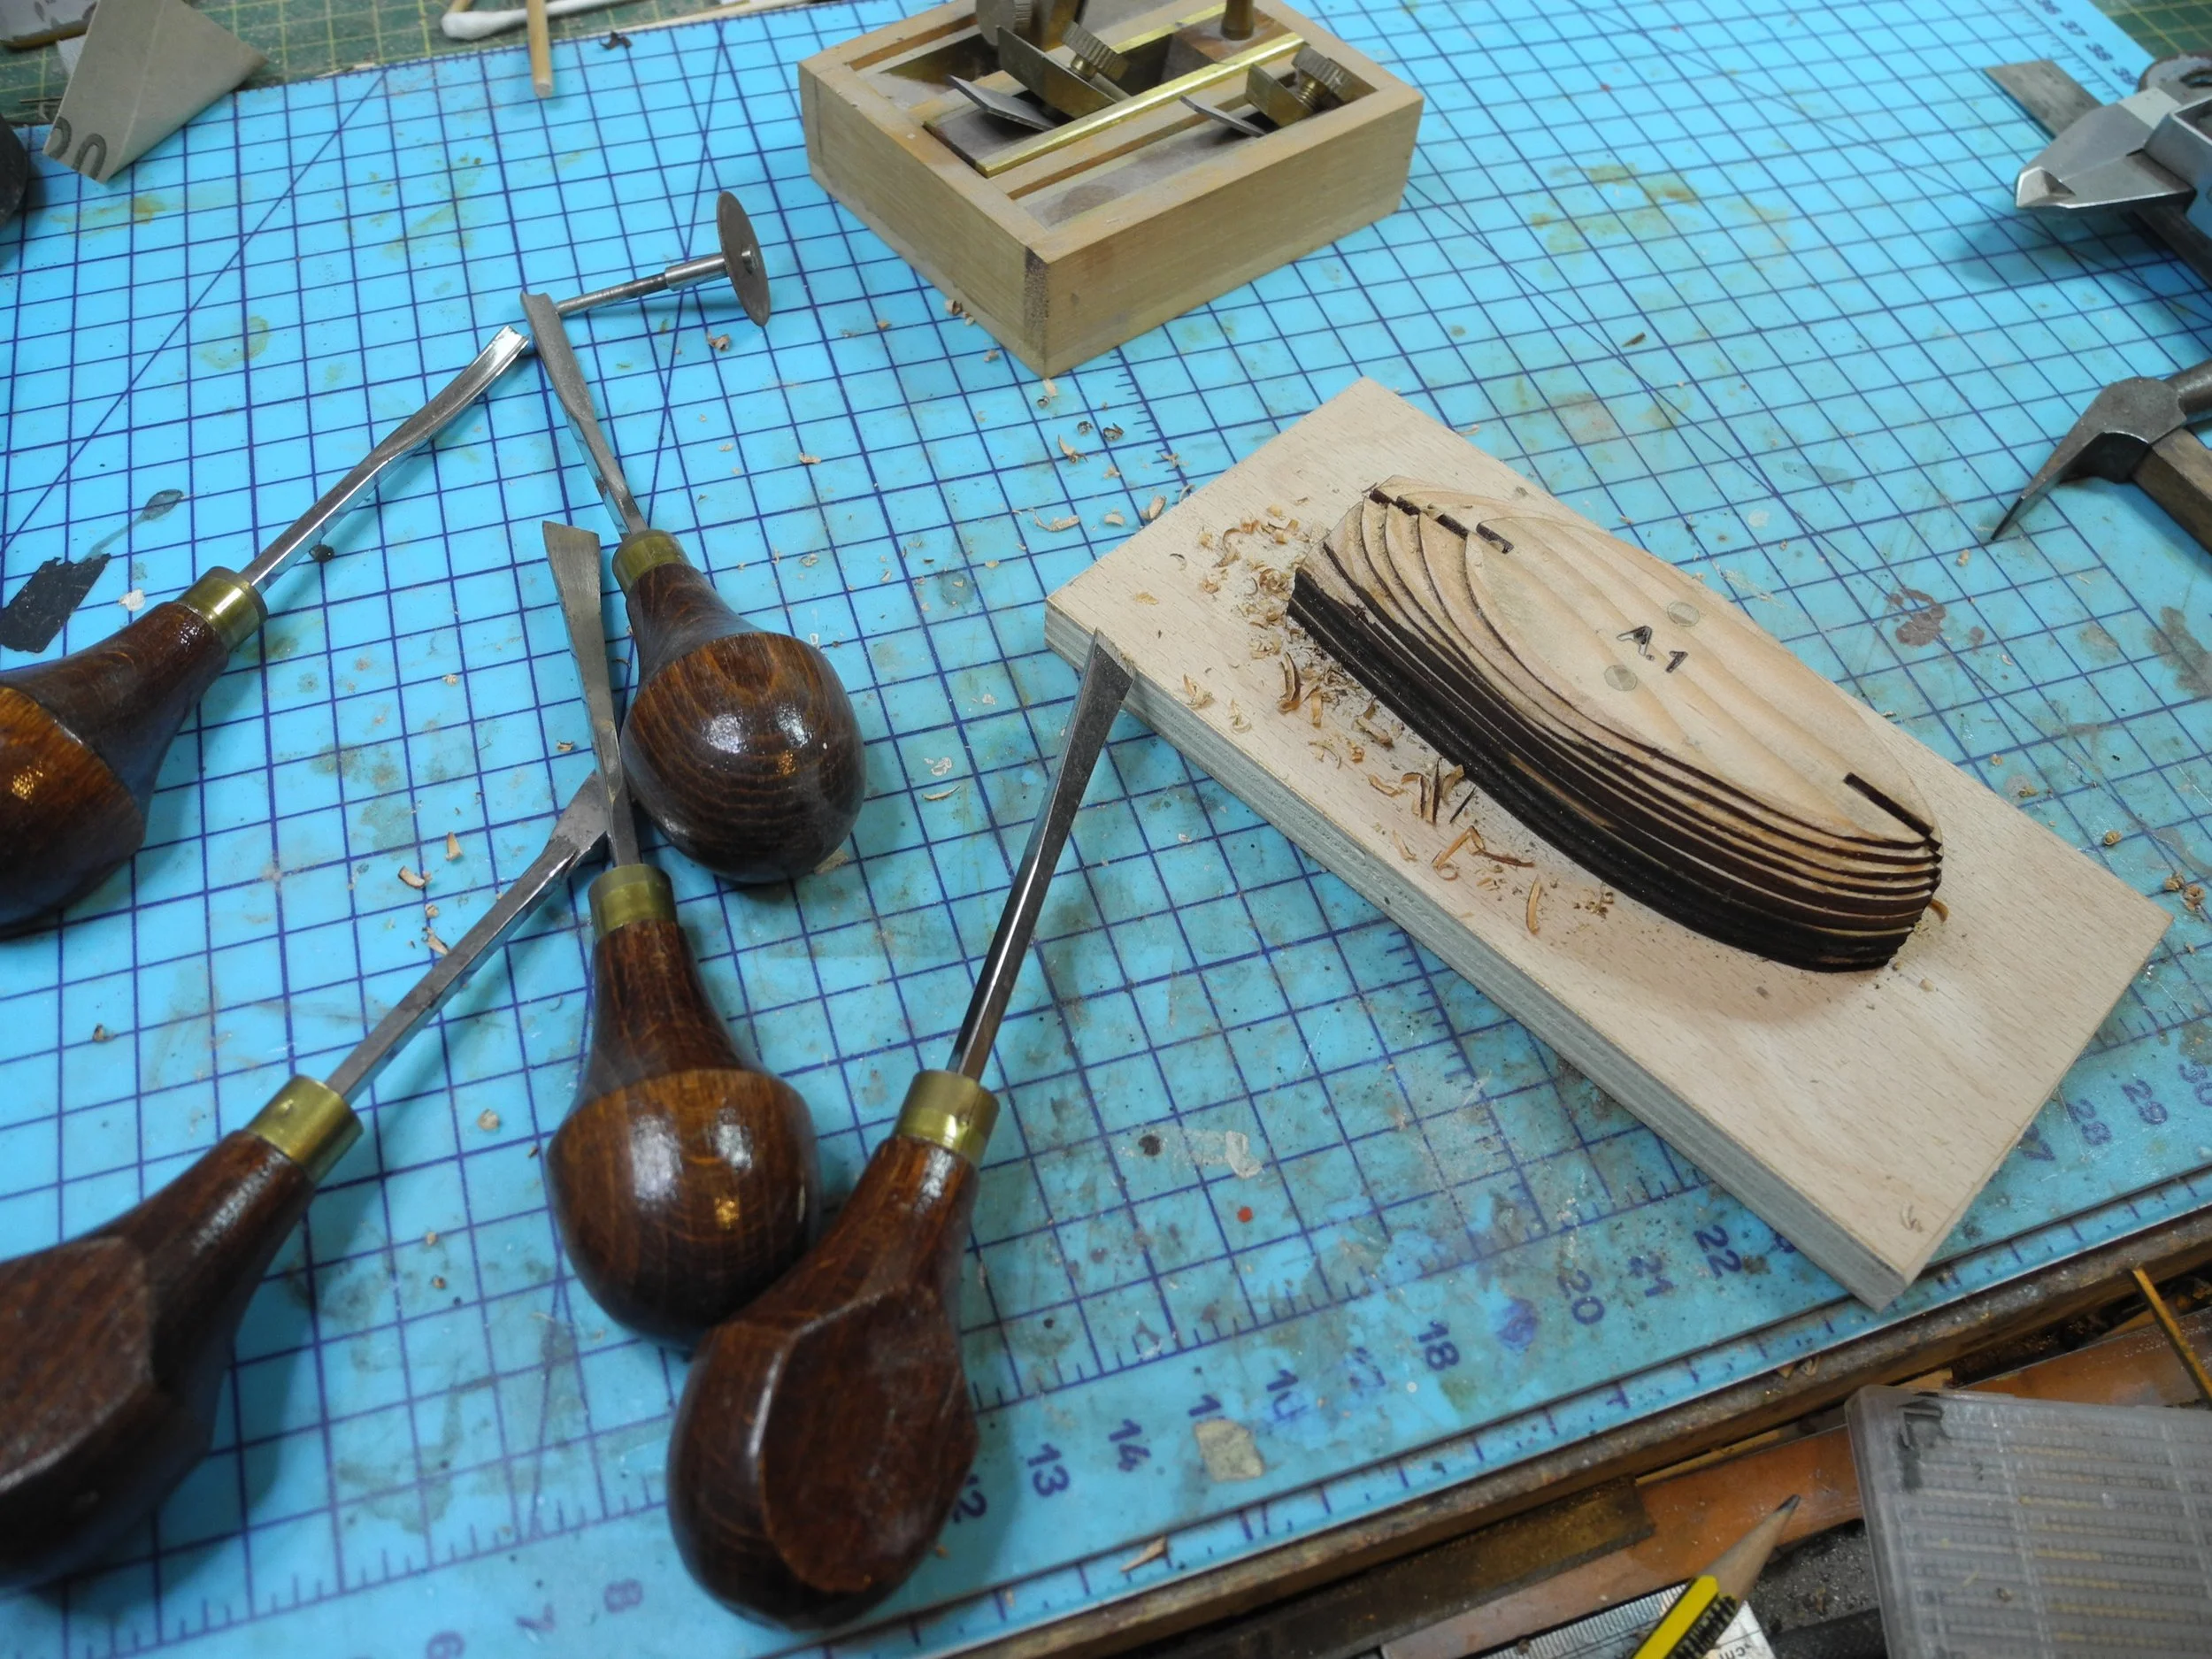
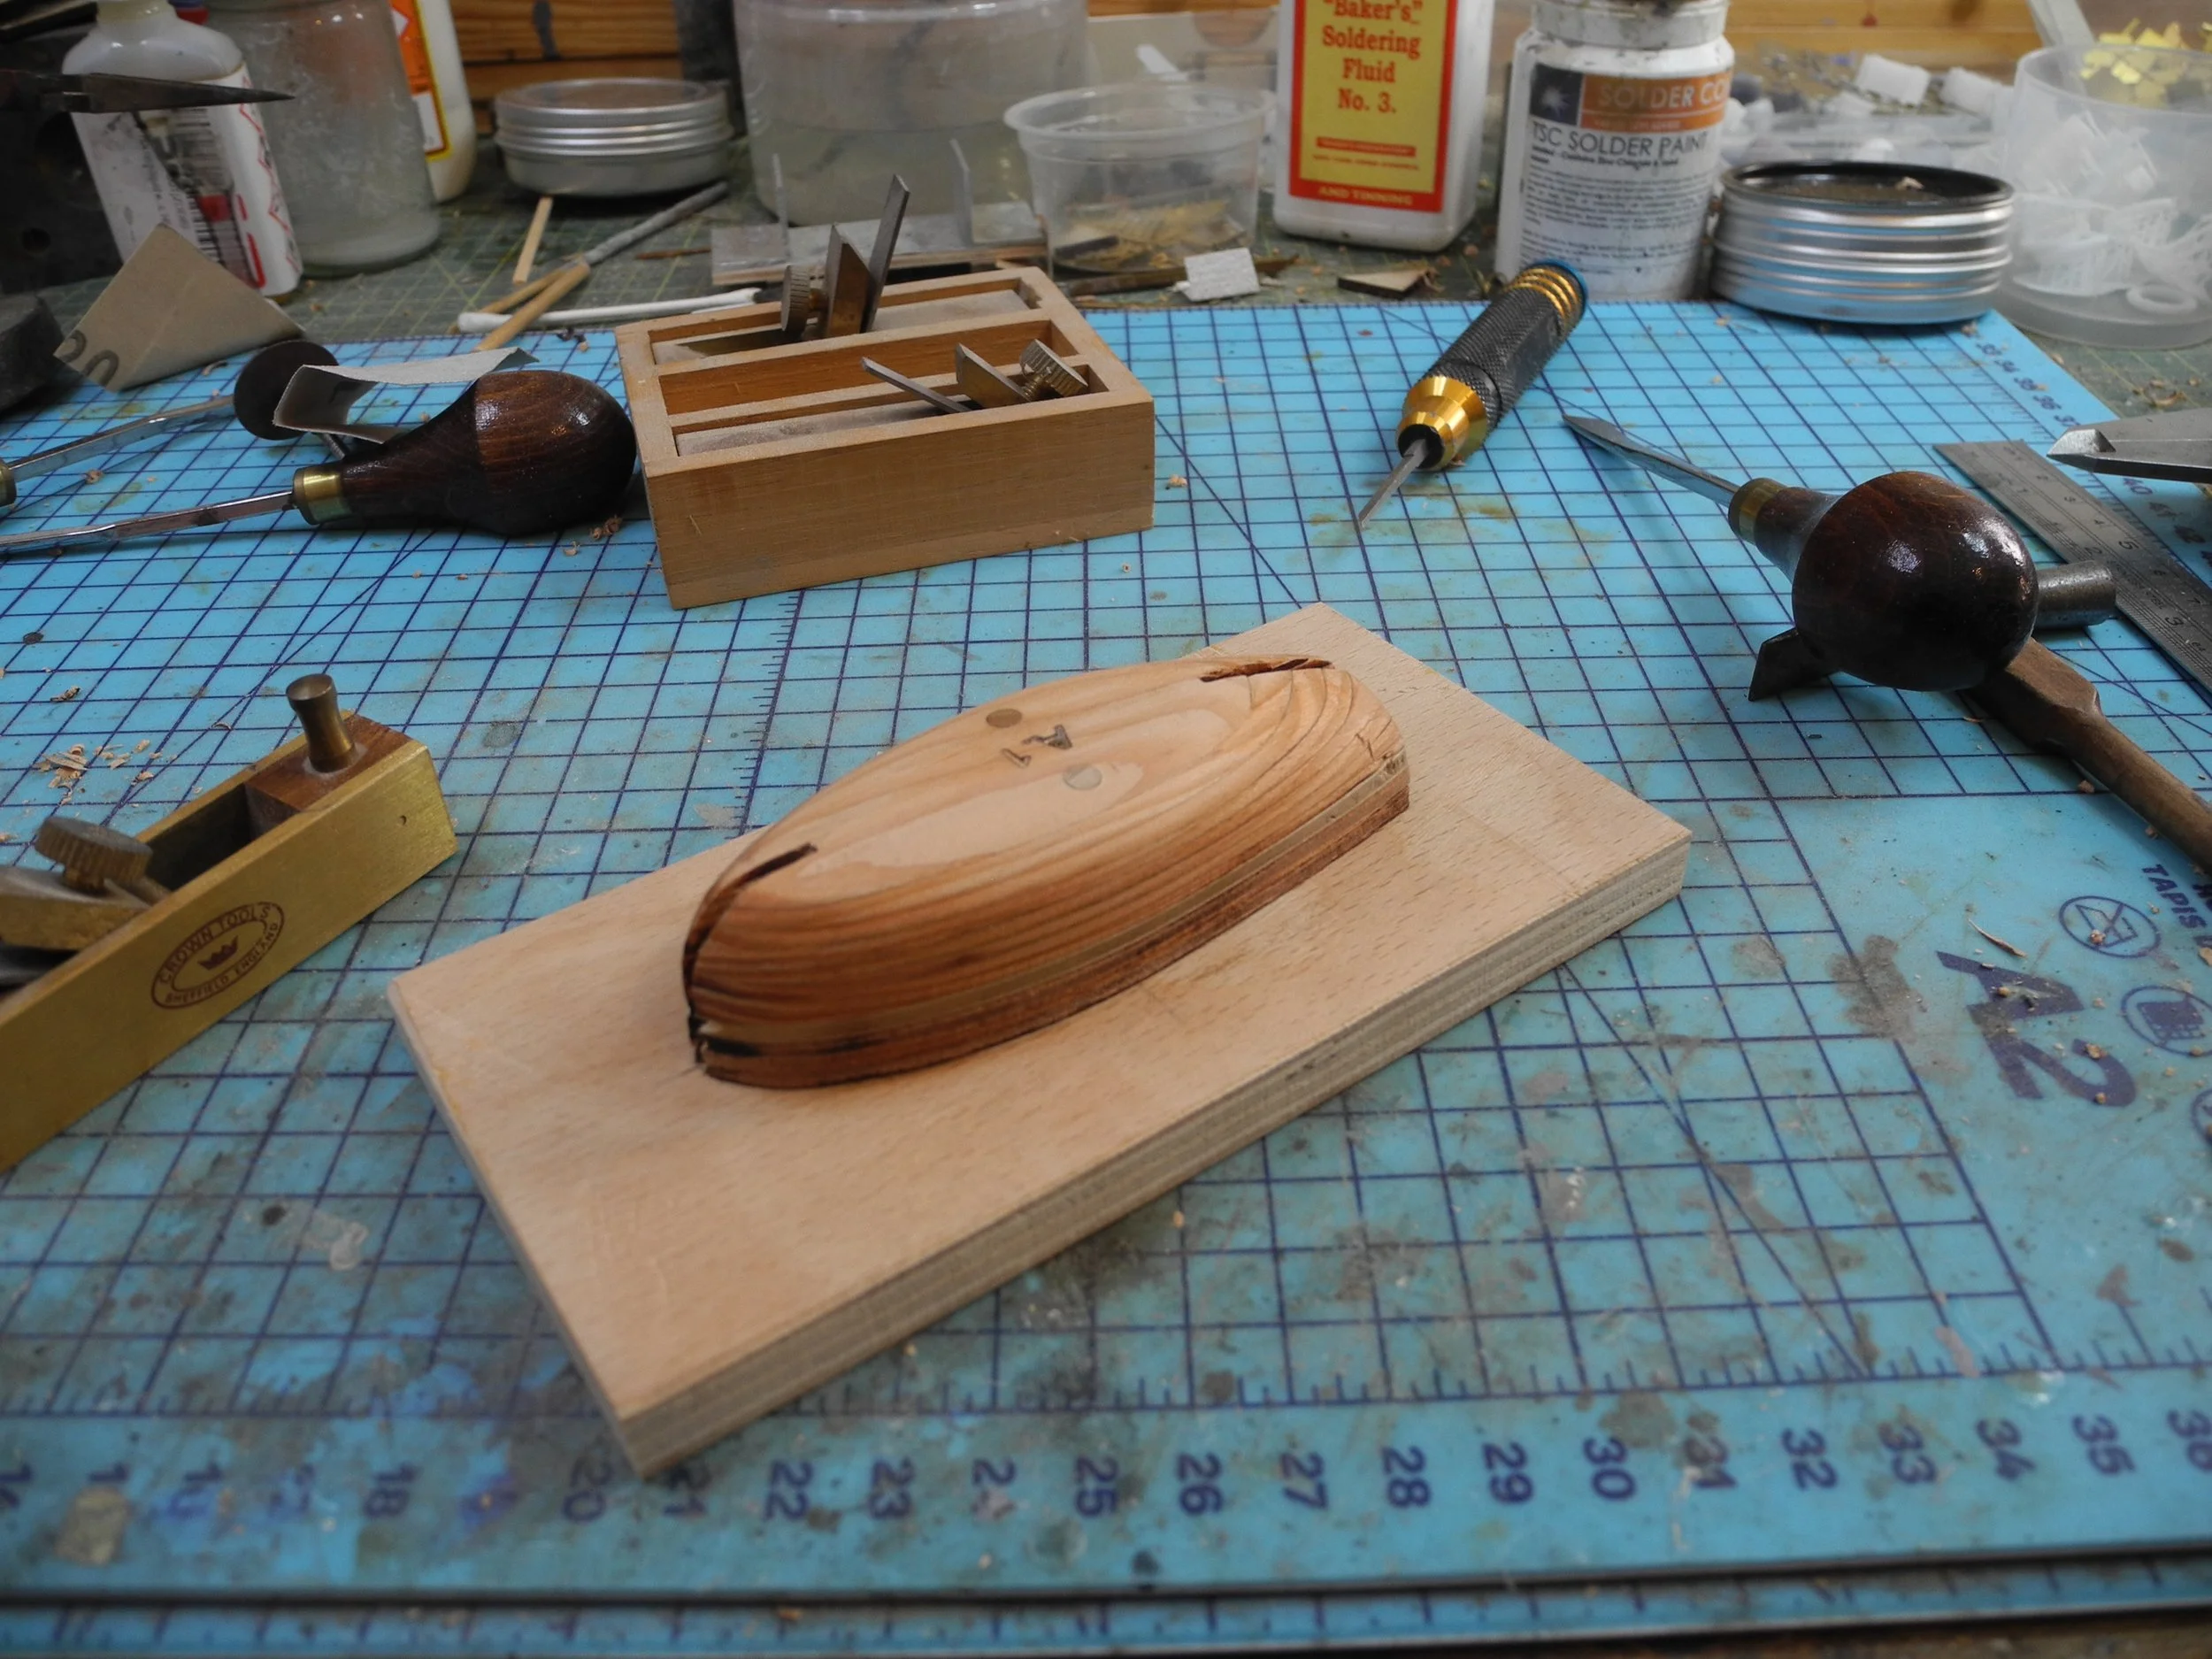
Carving tools used to remove the corners and create a smooth buck
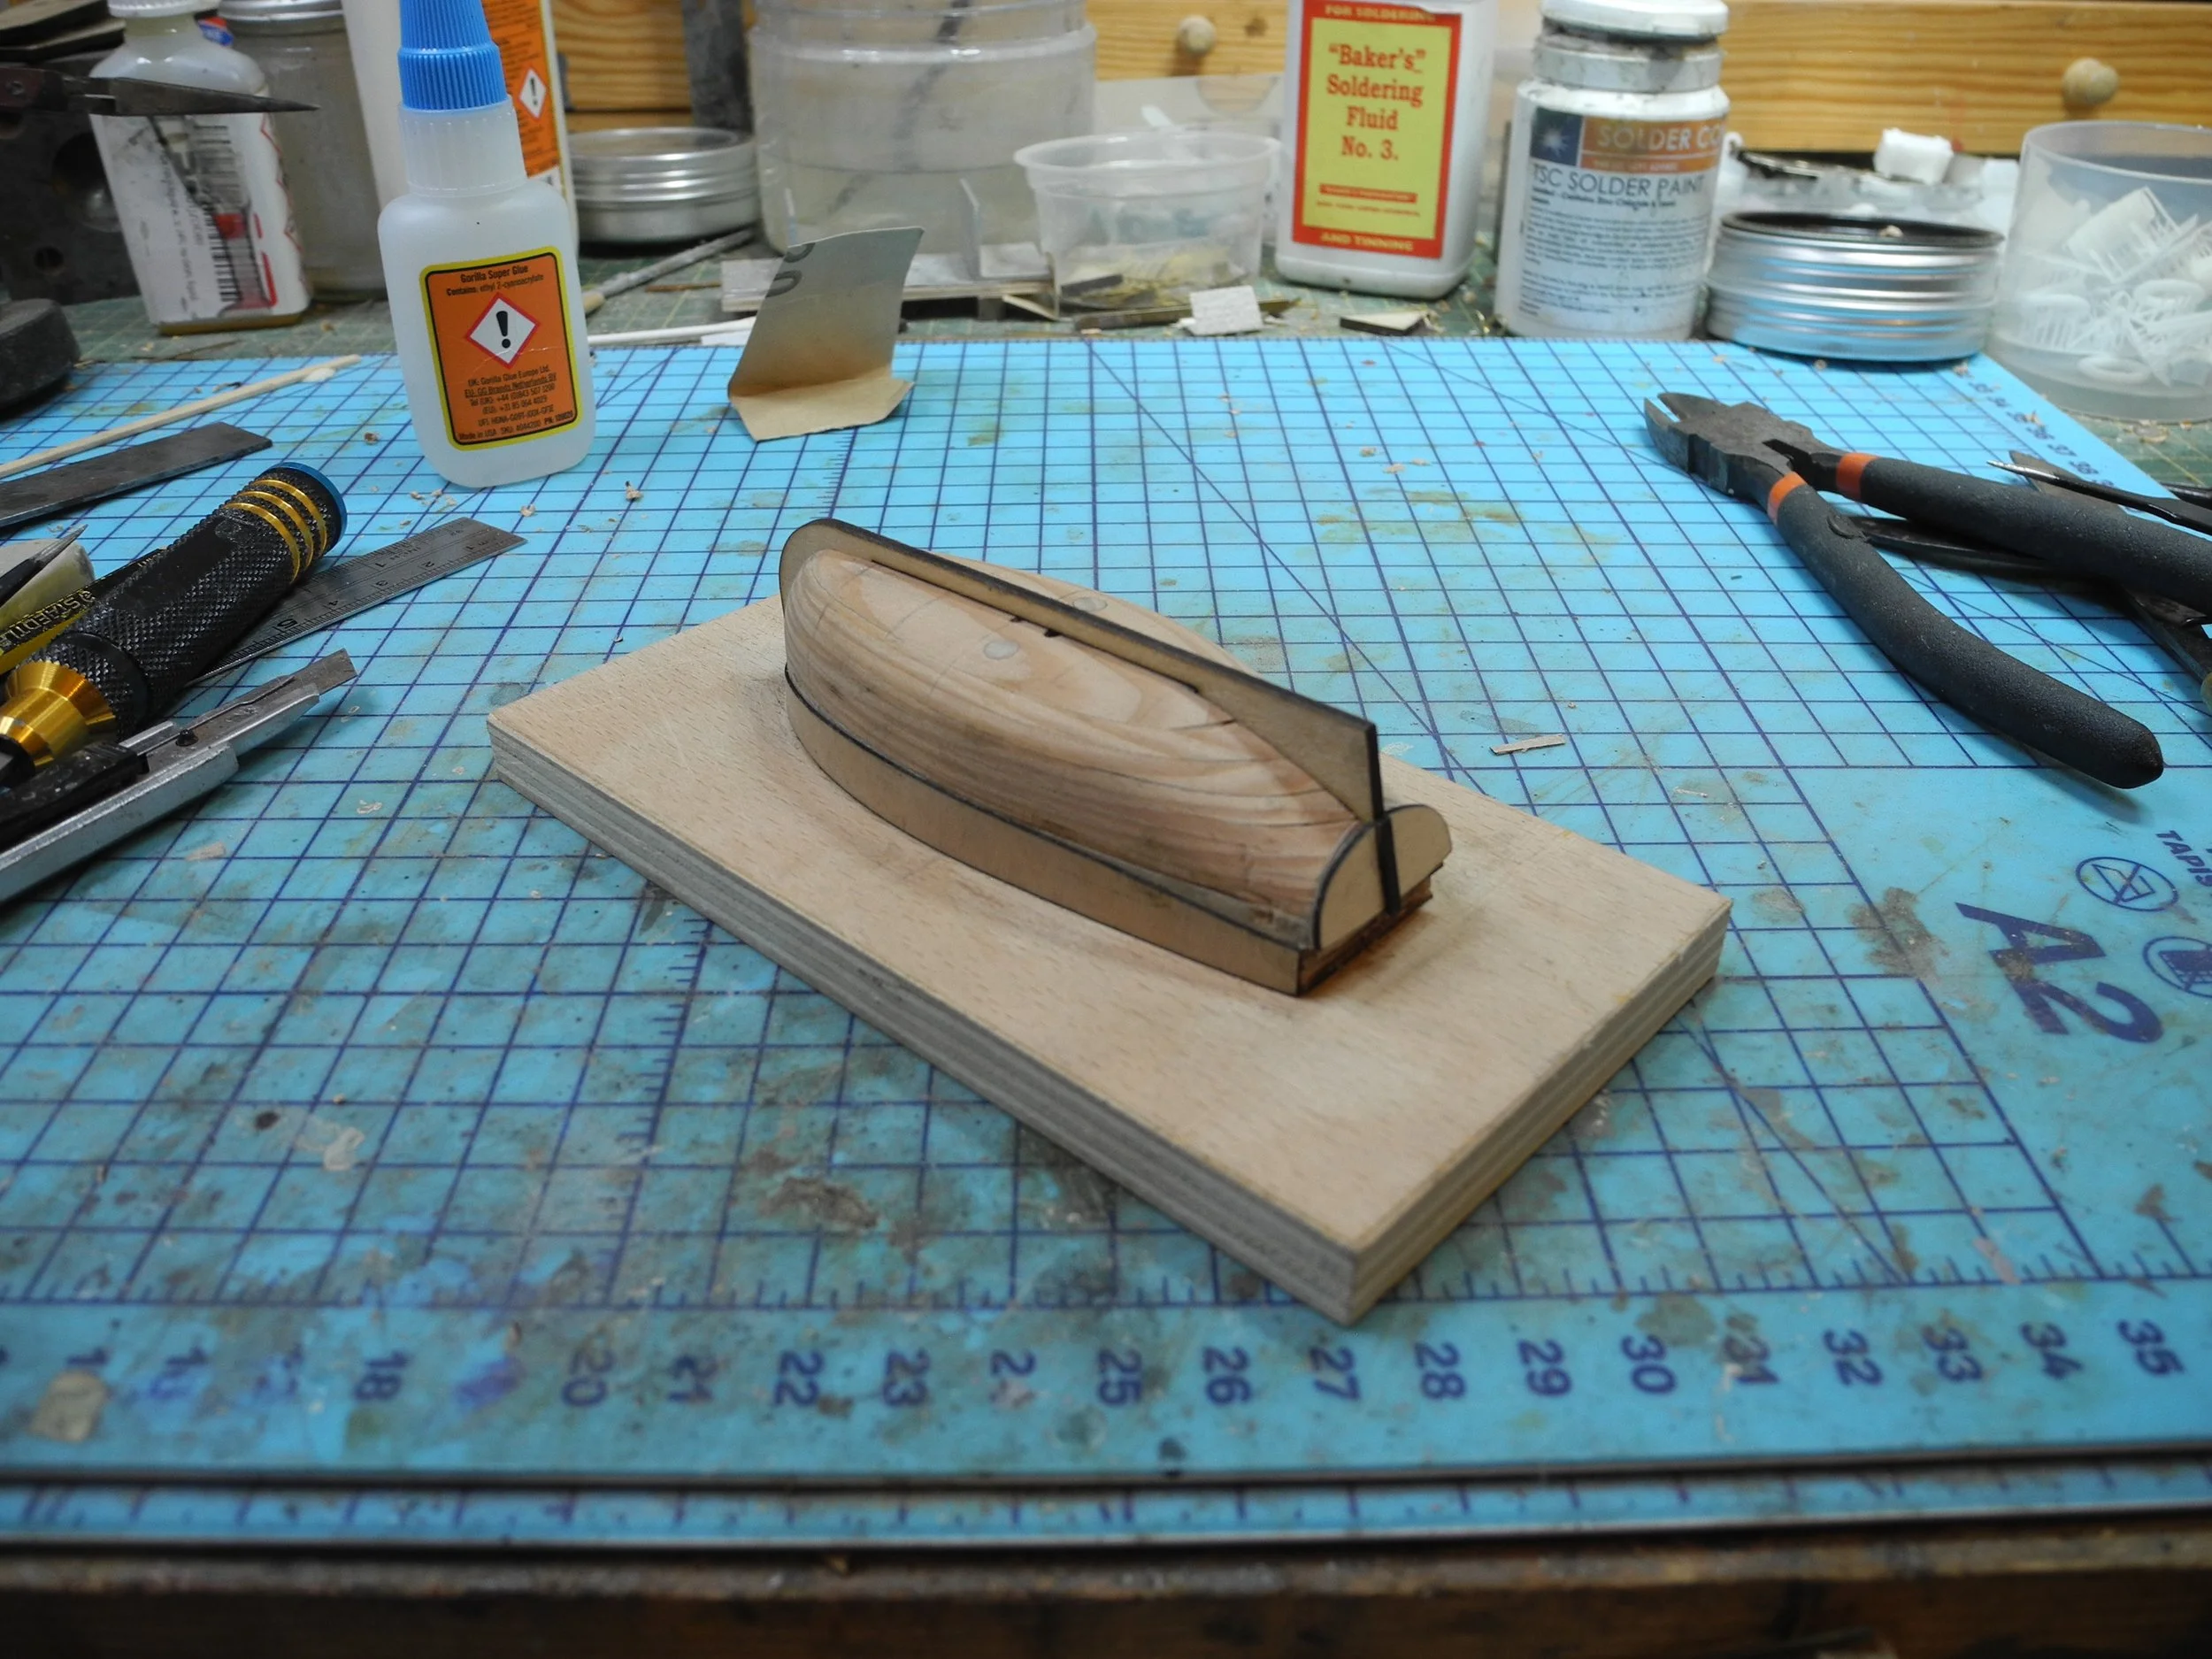
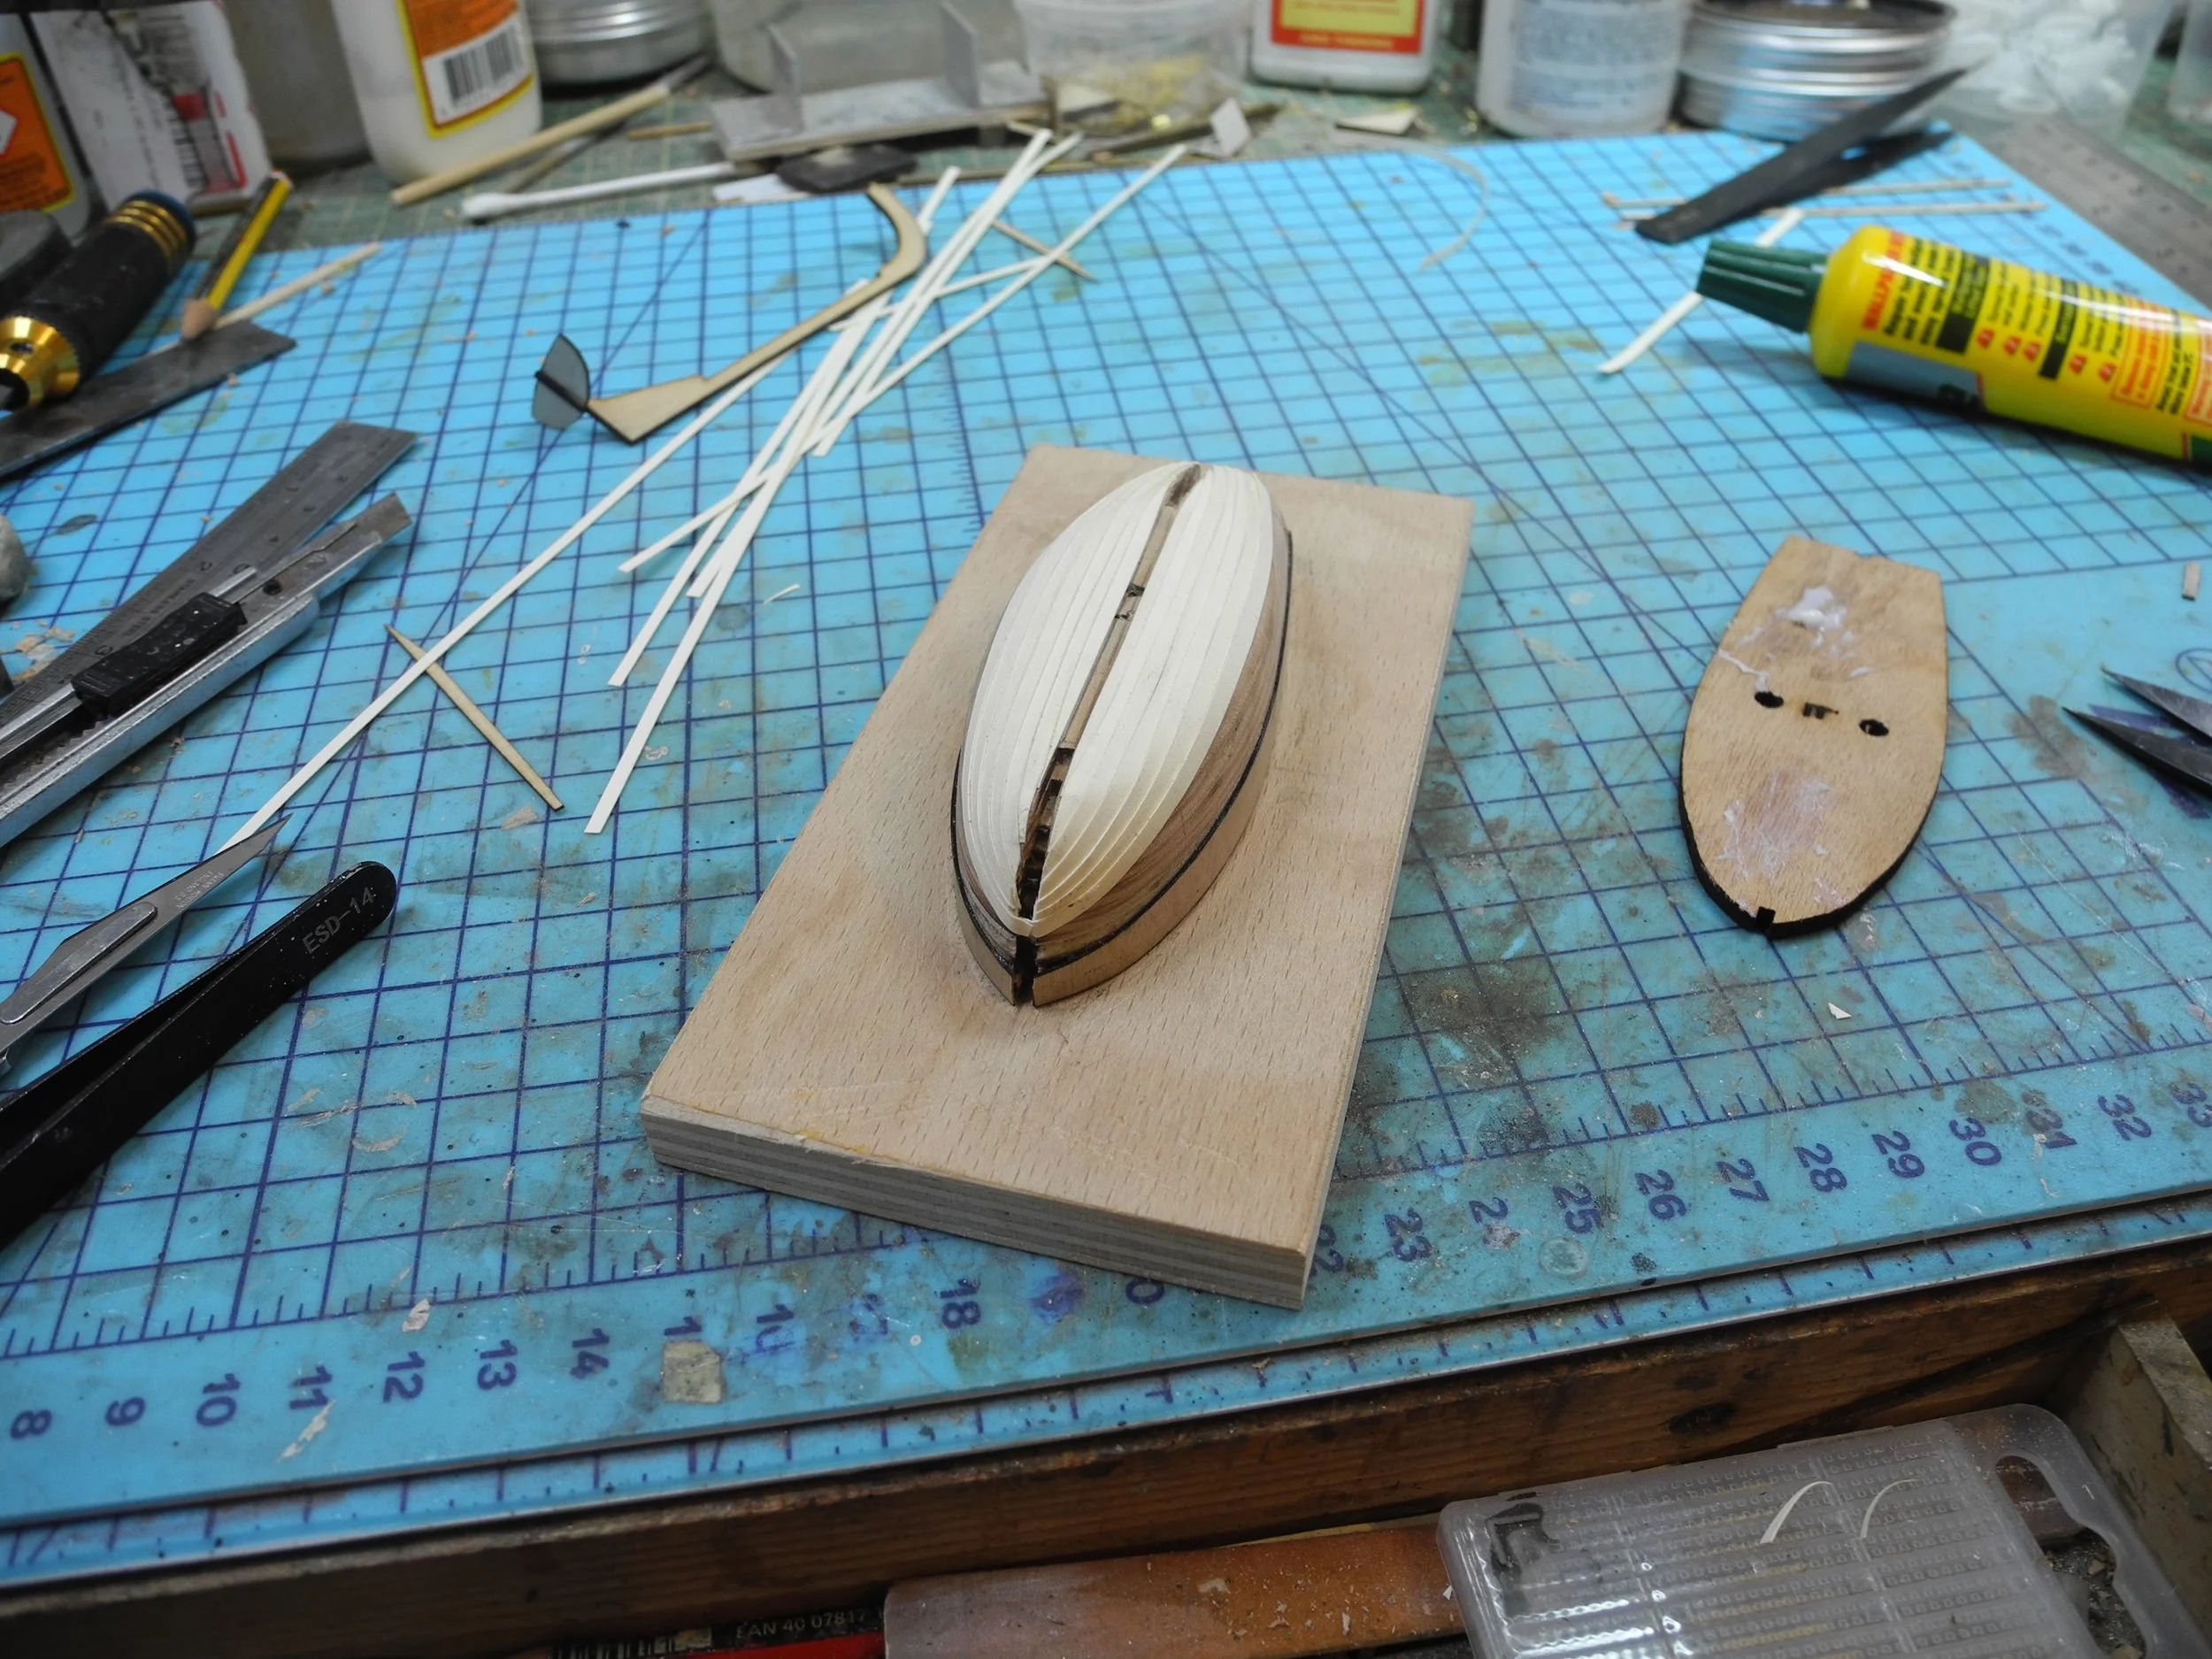
The keel and transom are cut from ply so they slot into the mould and the sheer line is added using thin plywood to define the shape of the tissue shell upper edge
For a clinker hull, the planks are then added to the mould. These will define the inner side of the tissue shell and give the impression of the planking when viewed from above. This inner planking is also a good practice run for the outer planking that will be added to the shell later. The planking can be added using veneer or card, card, shown below, is more forgiving. Once complete, apply a layer of shellac or sanding sealer to waterproof the mould.
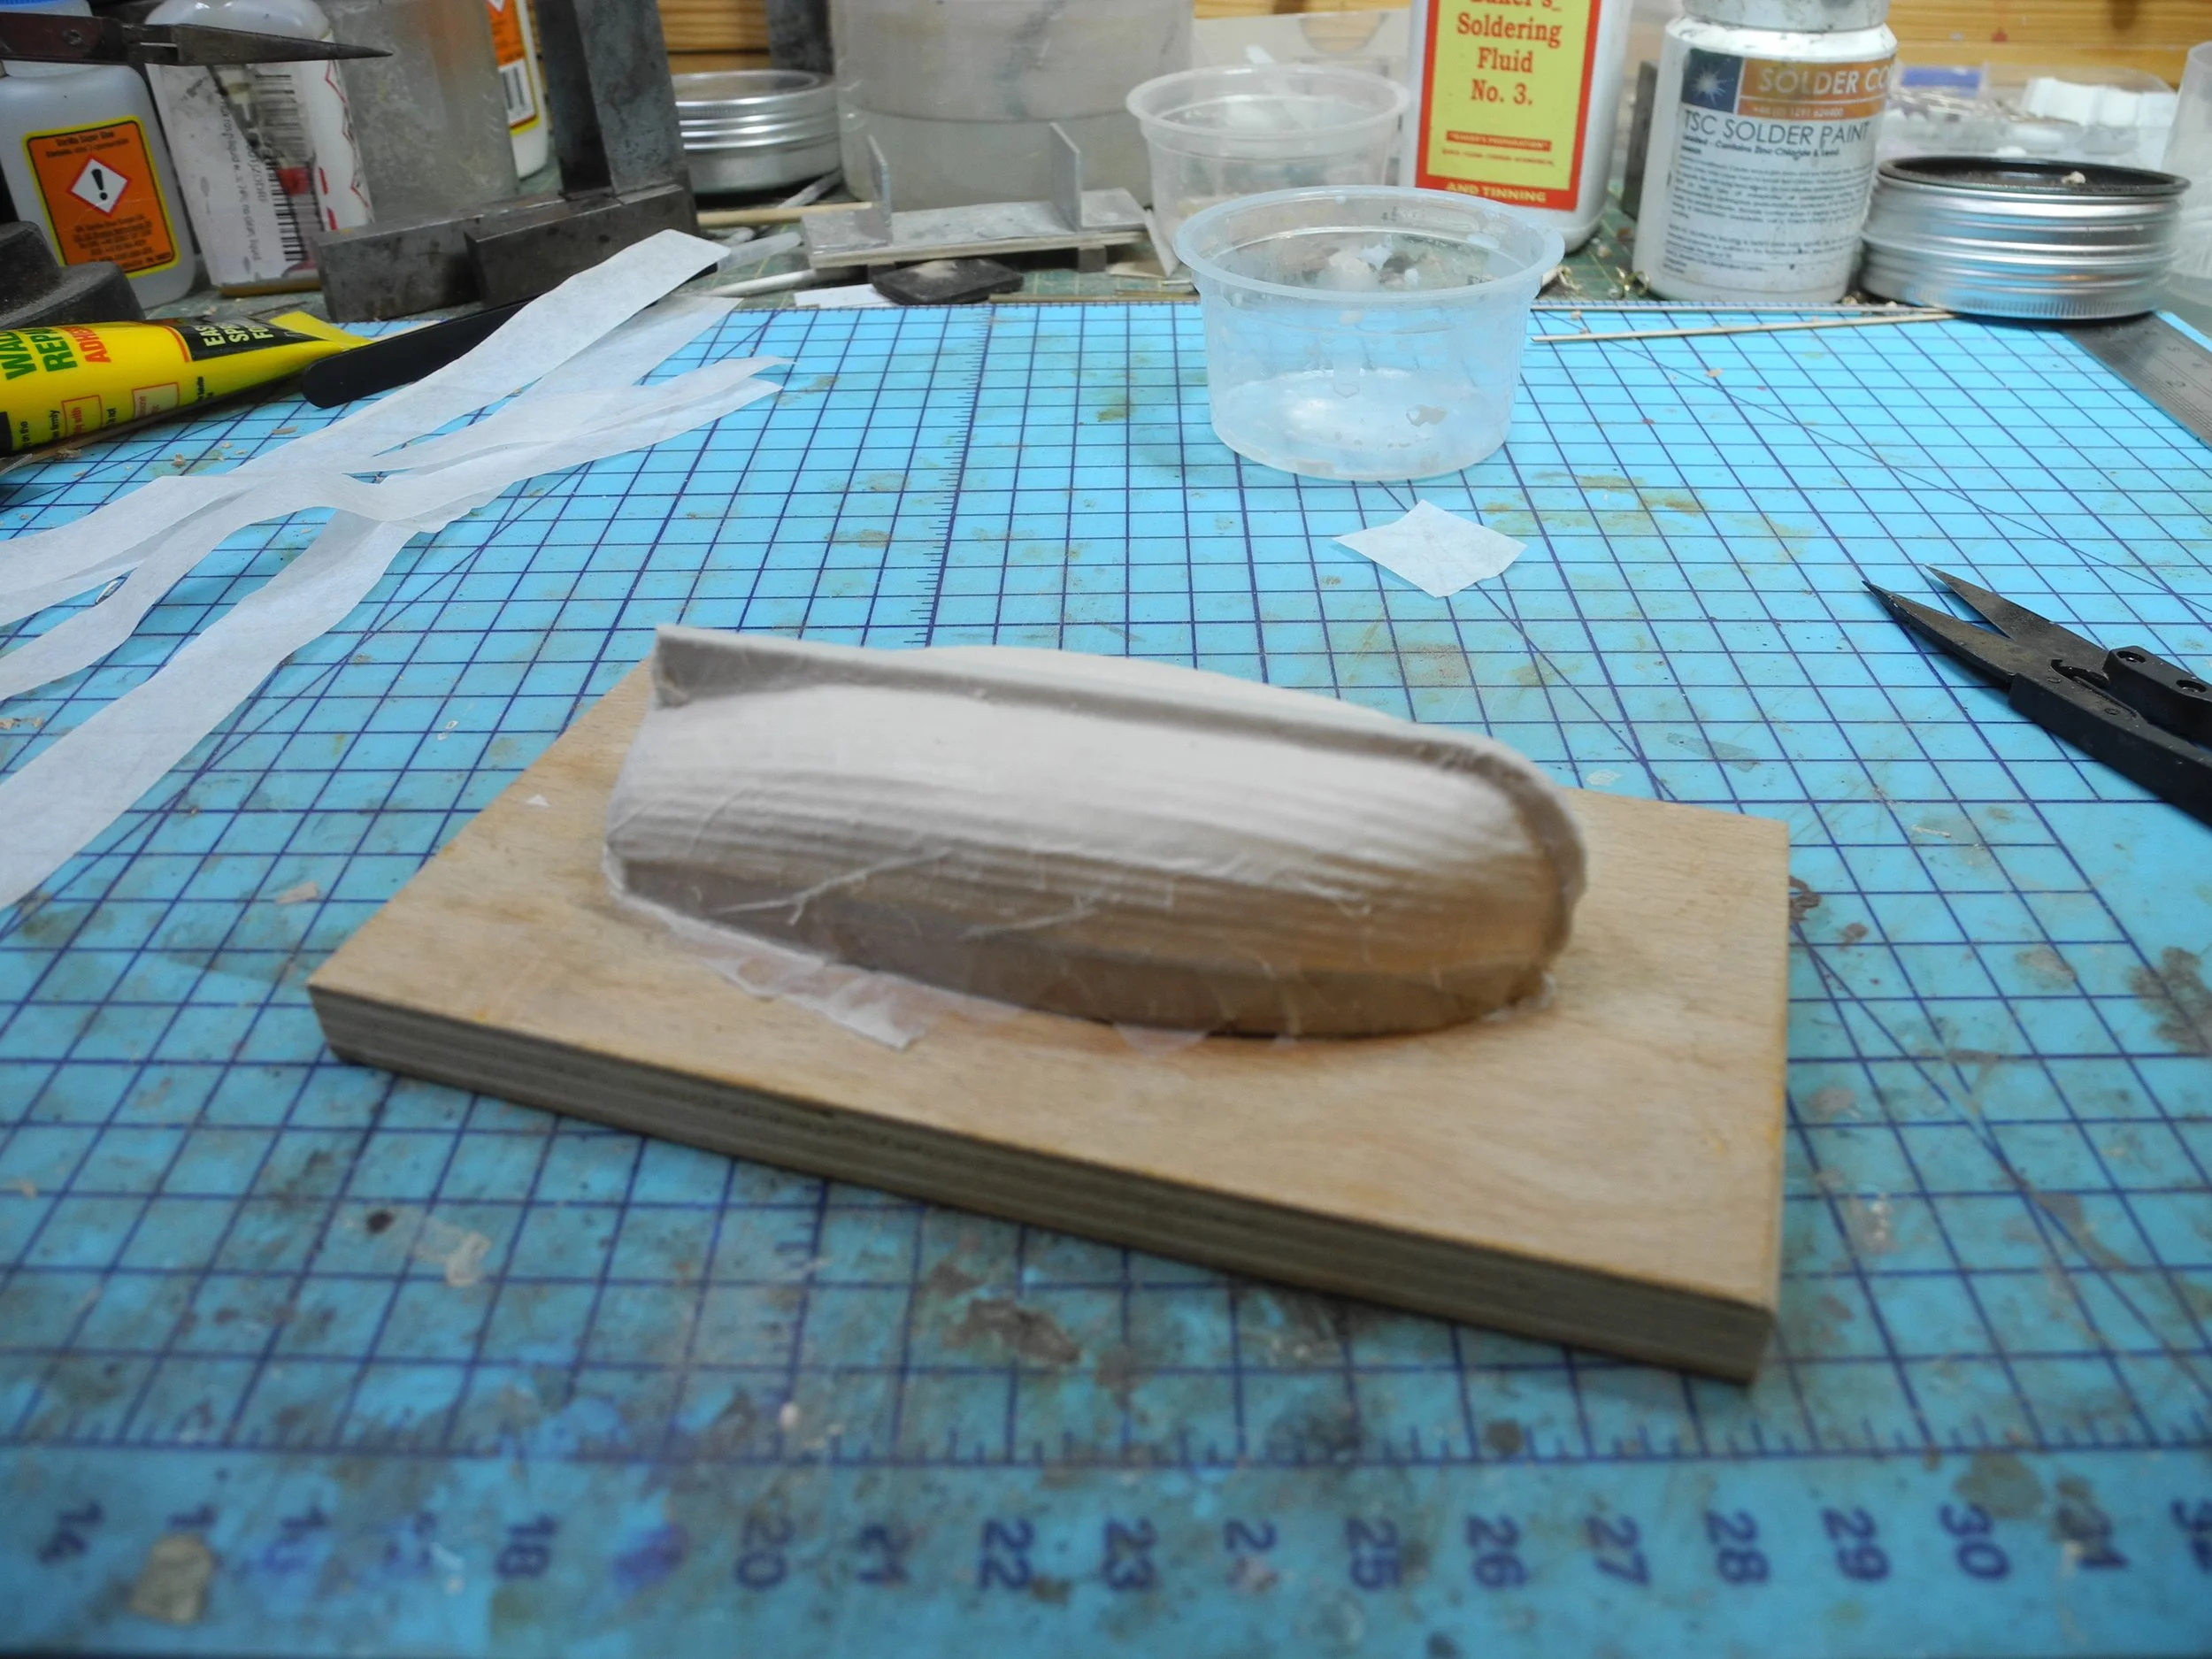
Once the sealer is dry, apply a layer of mould wax (aerosol versions are available) to act as a release agent to prevent the tissue sticking to the mould. Obviously do not apply the wax to the keel/transom assembly). Then install the keel and apply strips of tissue dipped in weak PVA (3 parts water, 1 PVA) and lay them over the mo9uld, using a small brush to push the tissue into the mould features. Overlapping diagonal strips work well, apply in both directions, up to 6 layers is good.
Leave this to dry overnight, after which, cut along the sheer line and gently ease the shell clear of the mould. As shown below, the clinker plank lines show nicely. The shell will need cleaning with white spirit to remove traces of wax before anything can be stuck to it
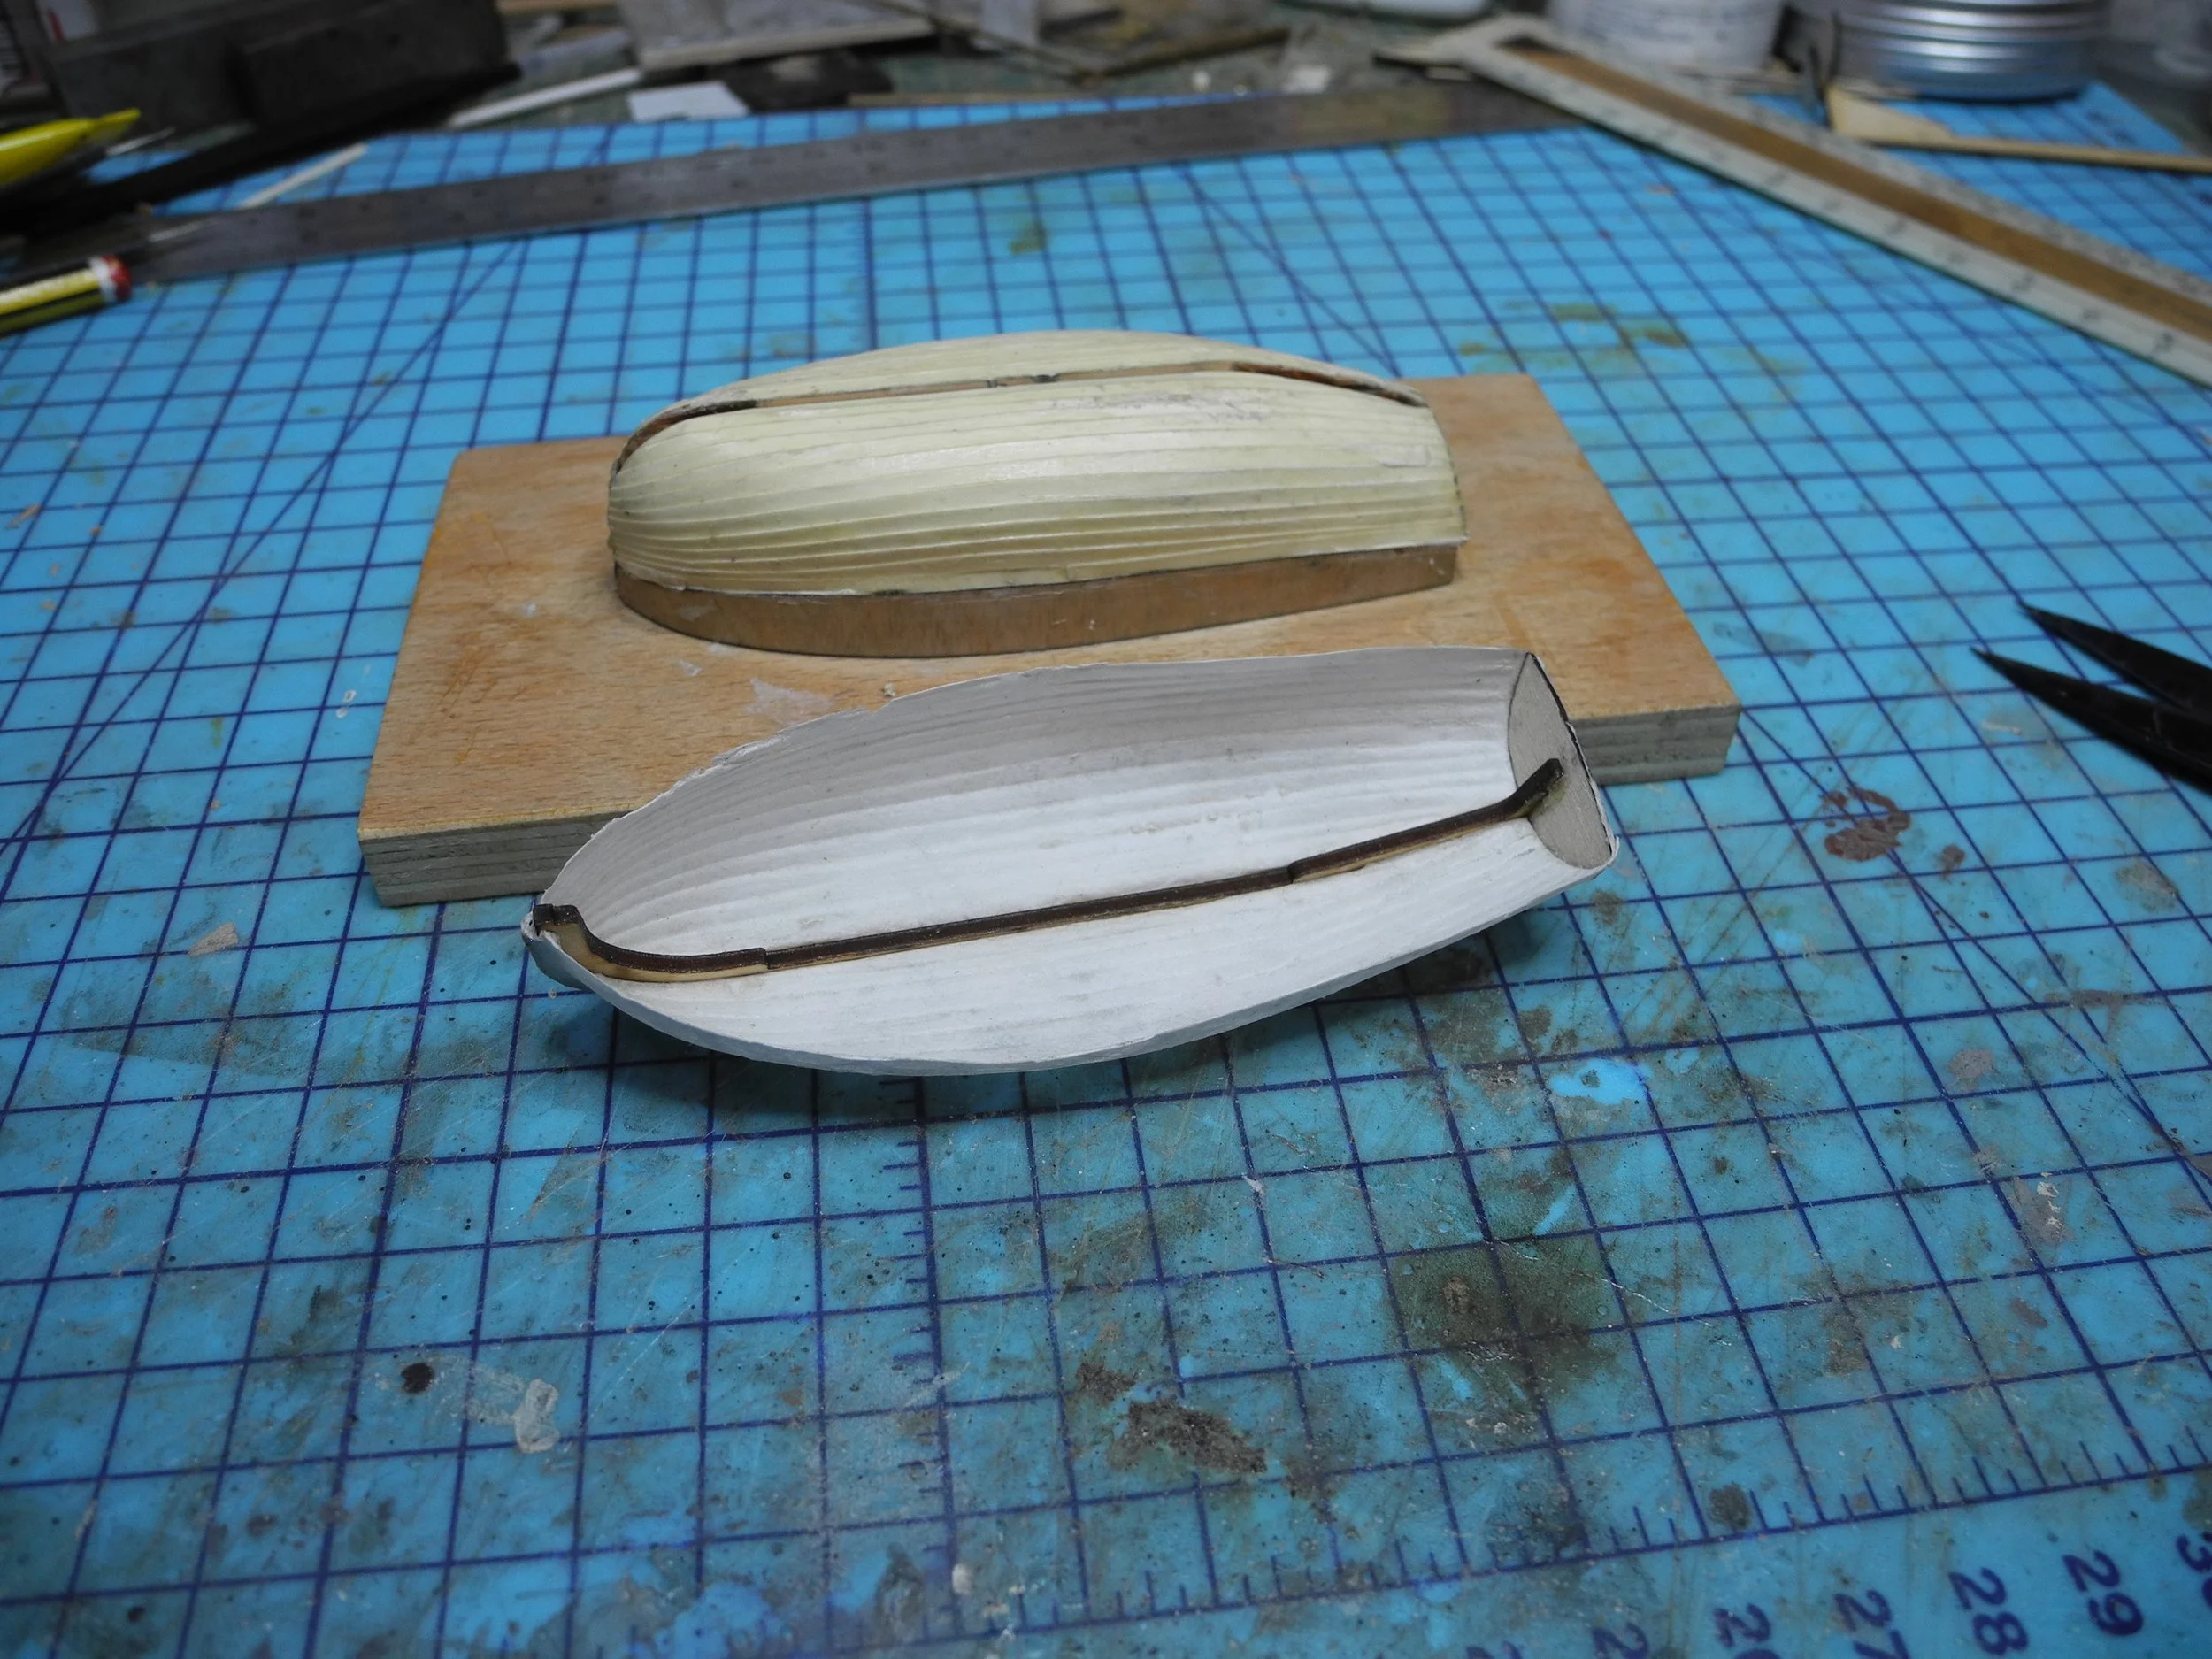
Then replace the shell back on the mould and plank the outside of the tissue shell, adding strength and creating the plank lines
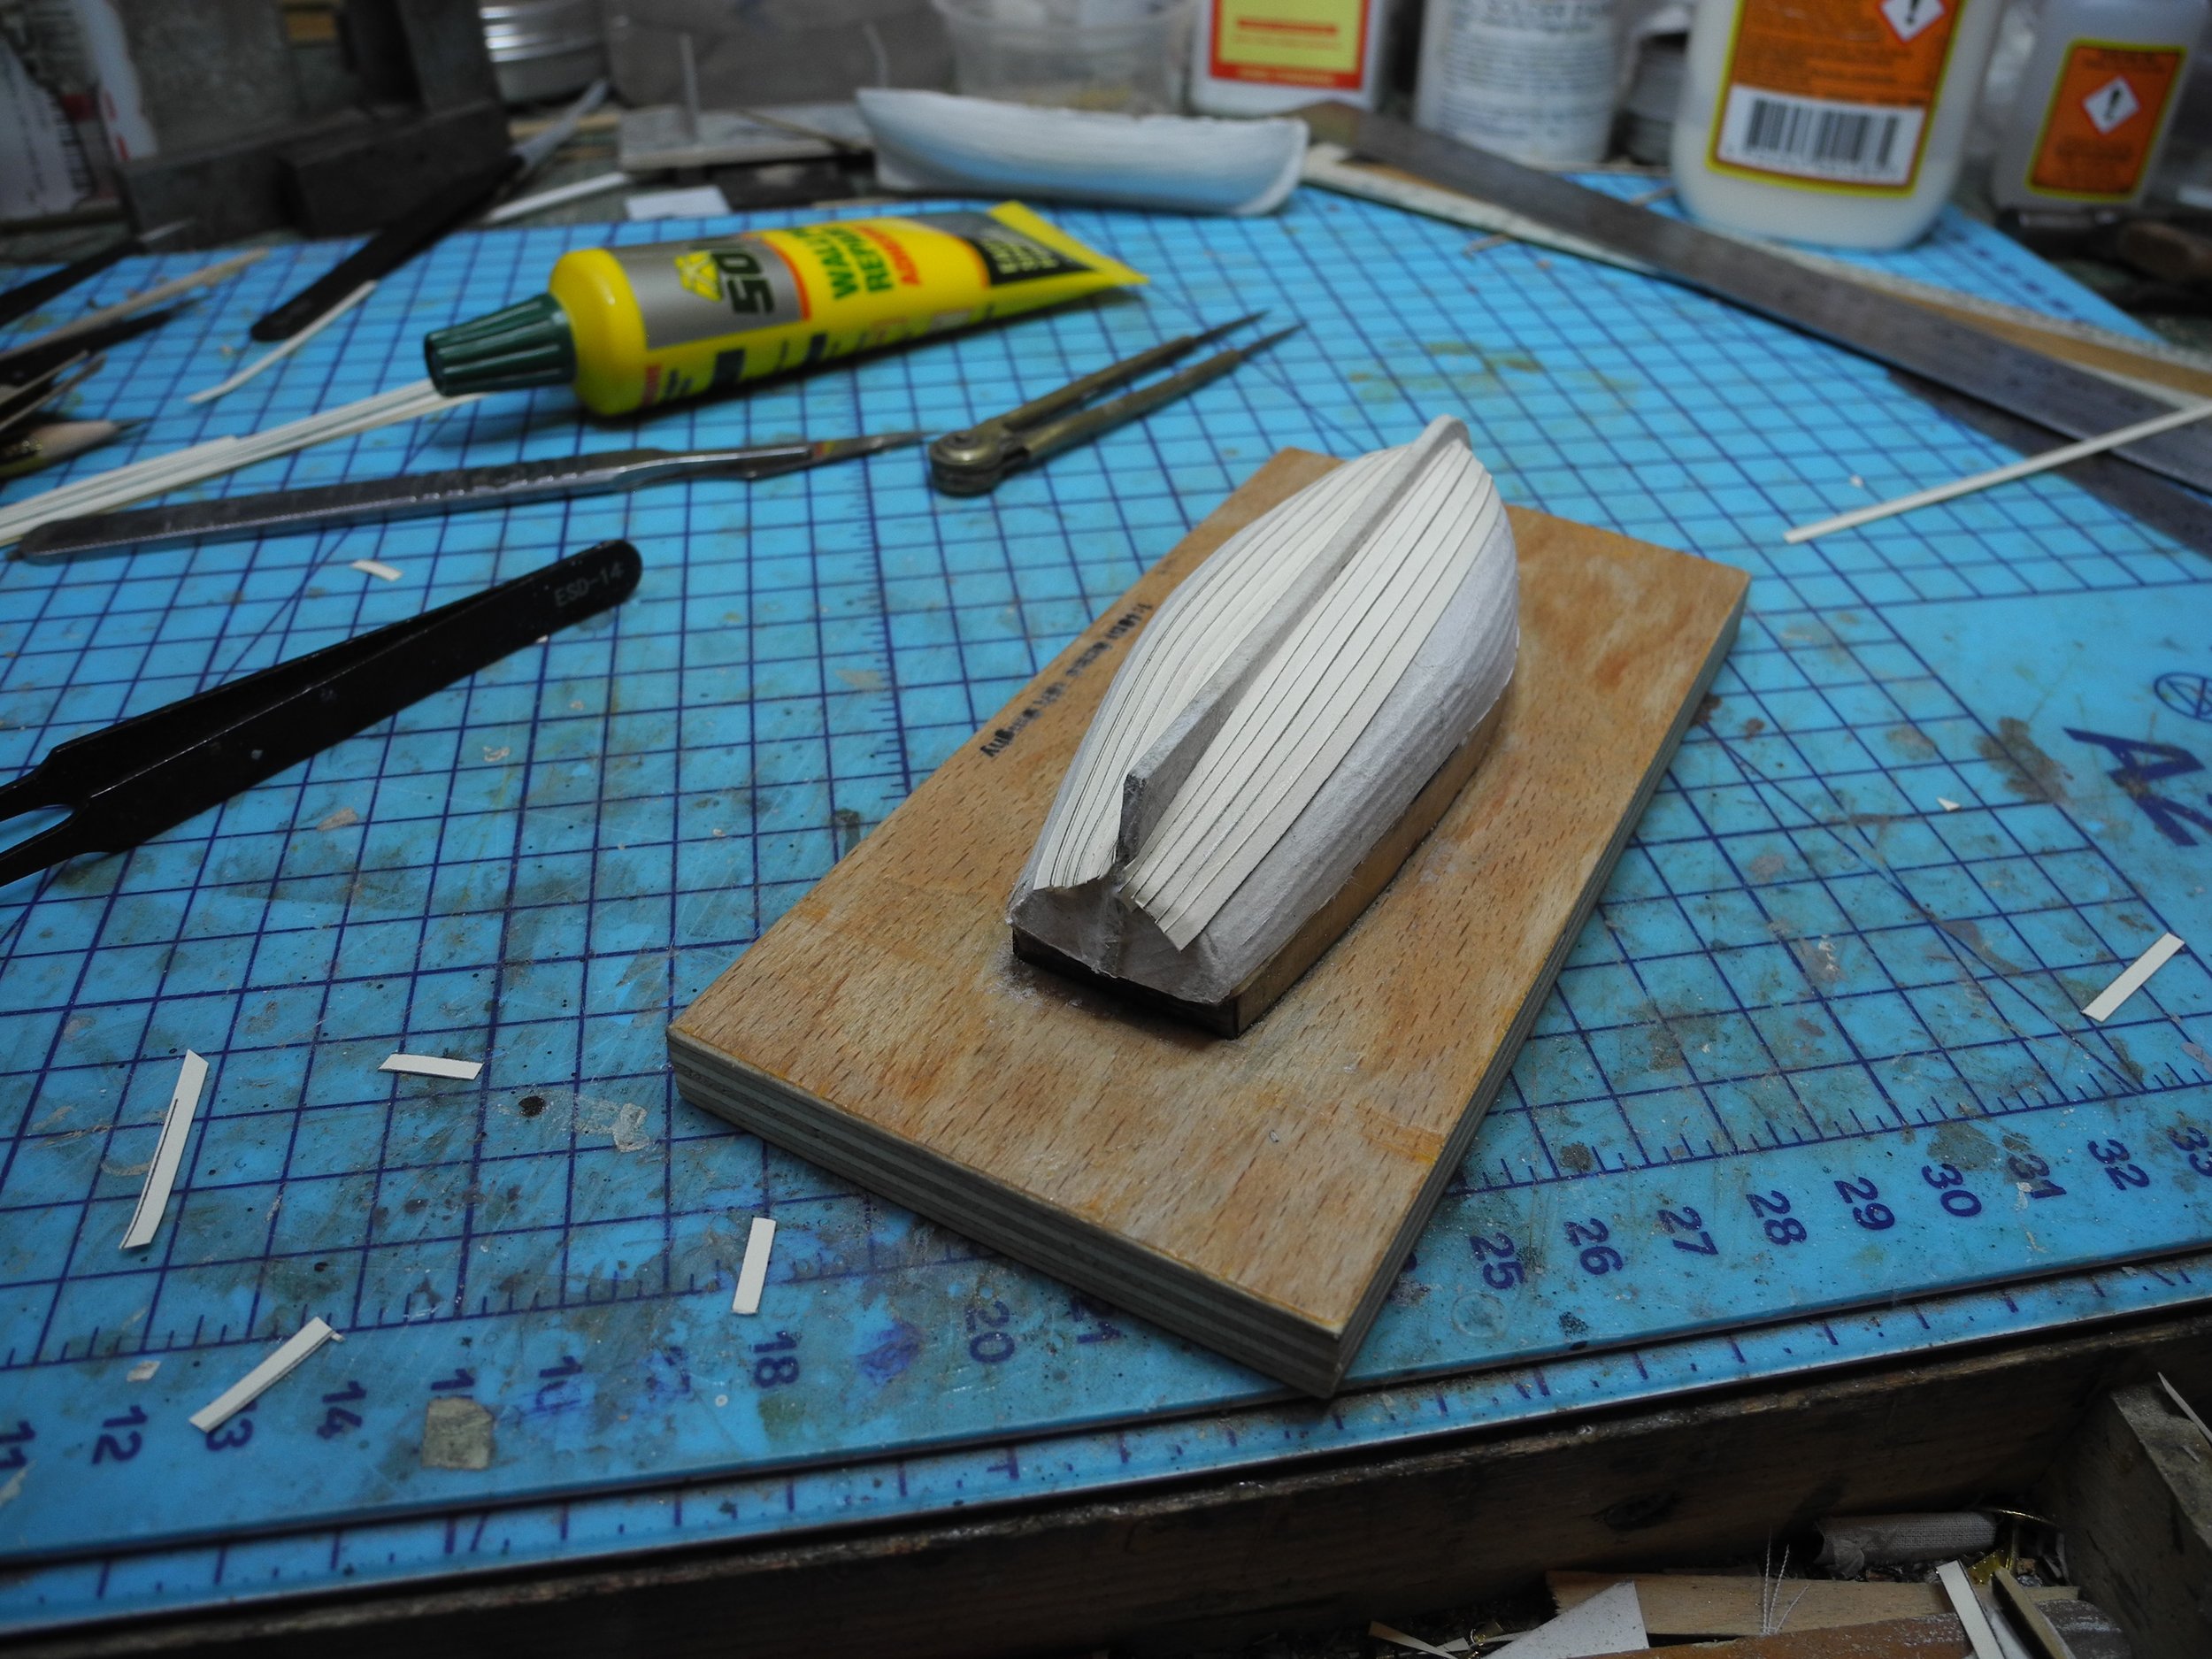
Once dry, this can be cleaned up, the final shape of the keel sanded back and progress can be made on fitting out the inside of the shell. The image below shows the gunwale packers being fixed in place. The ribs can be made from card or veneer (which has been used in the image below)
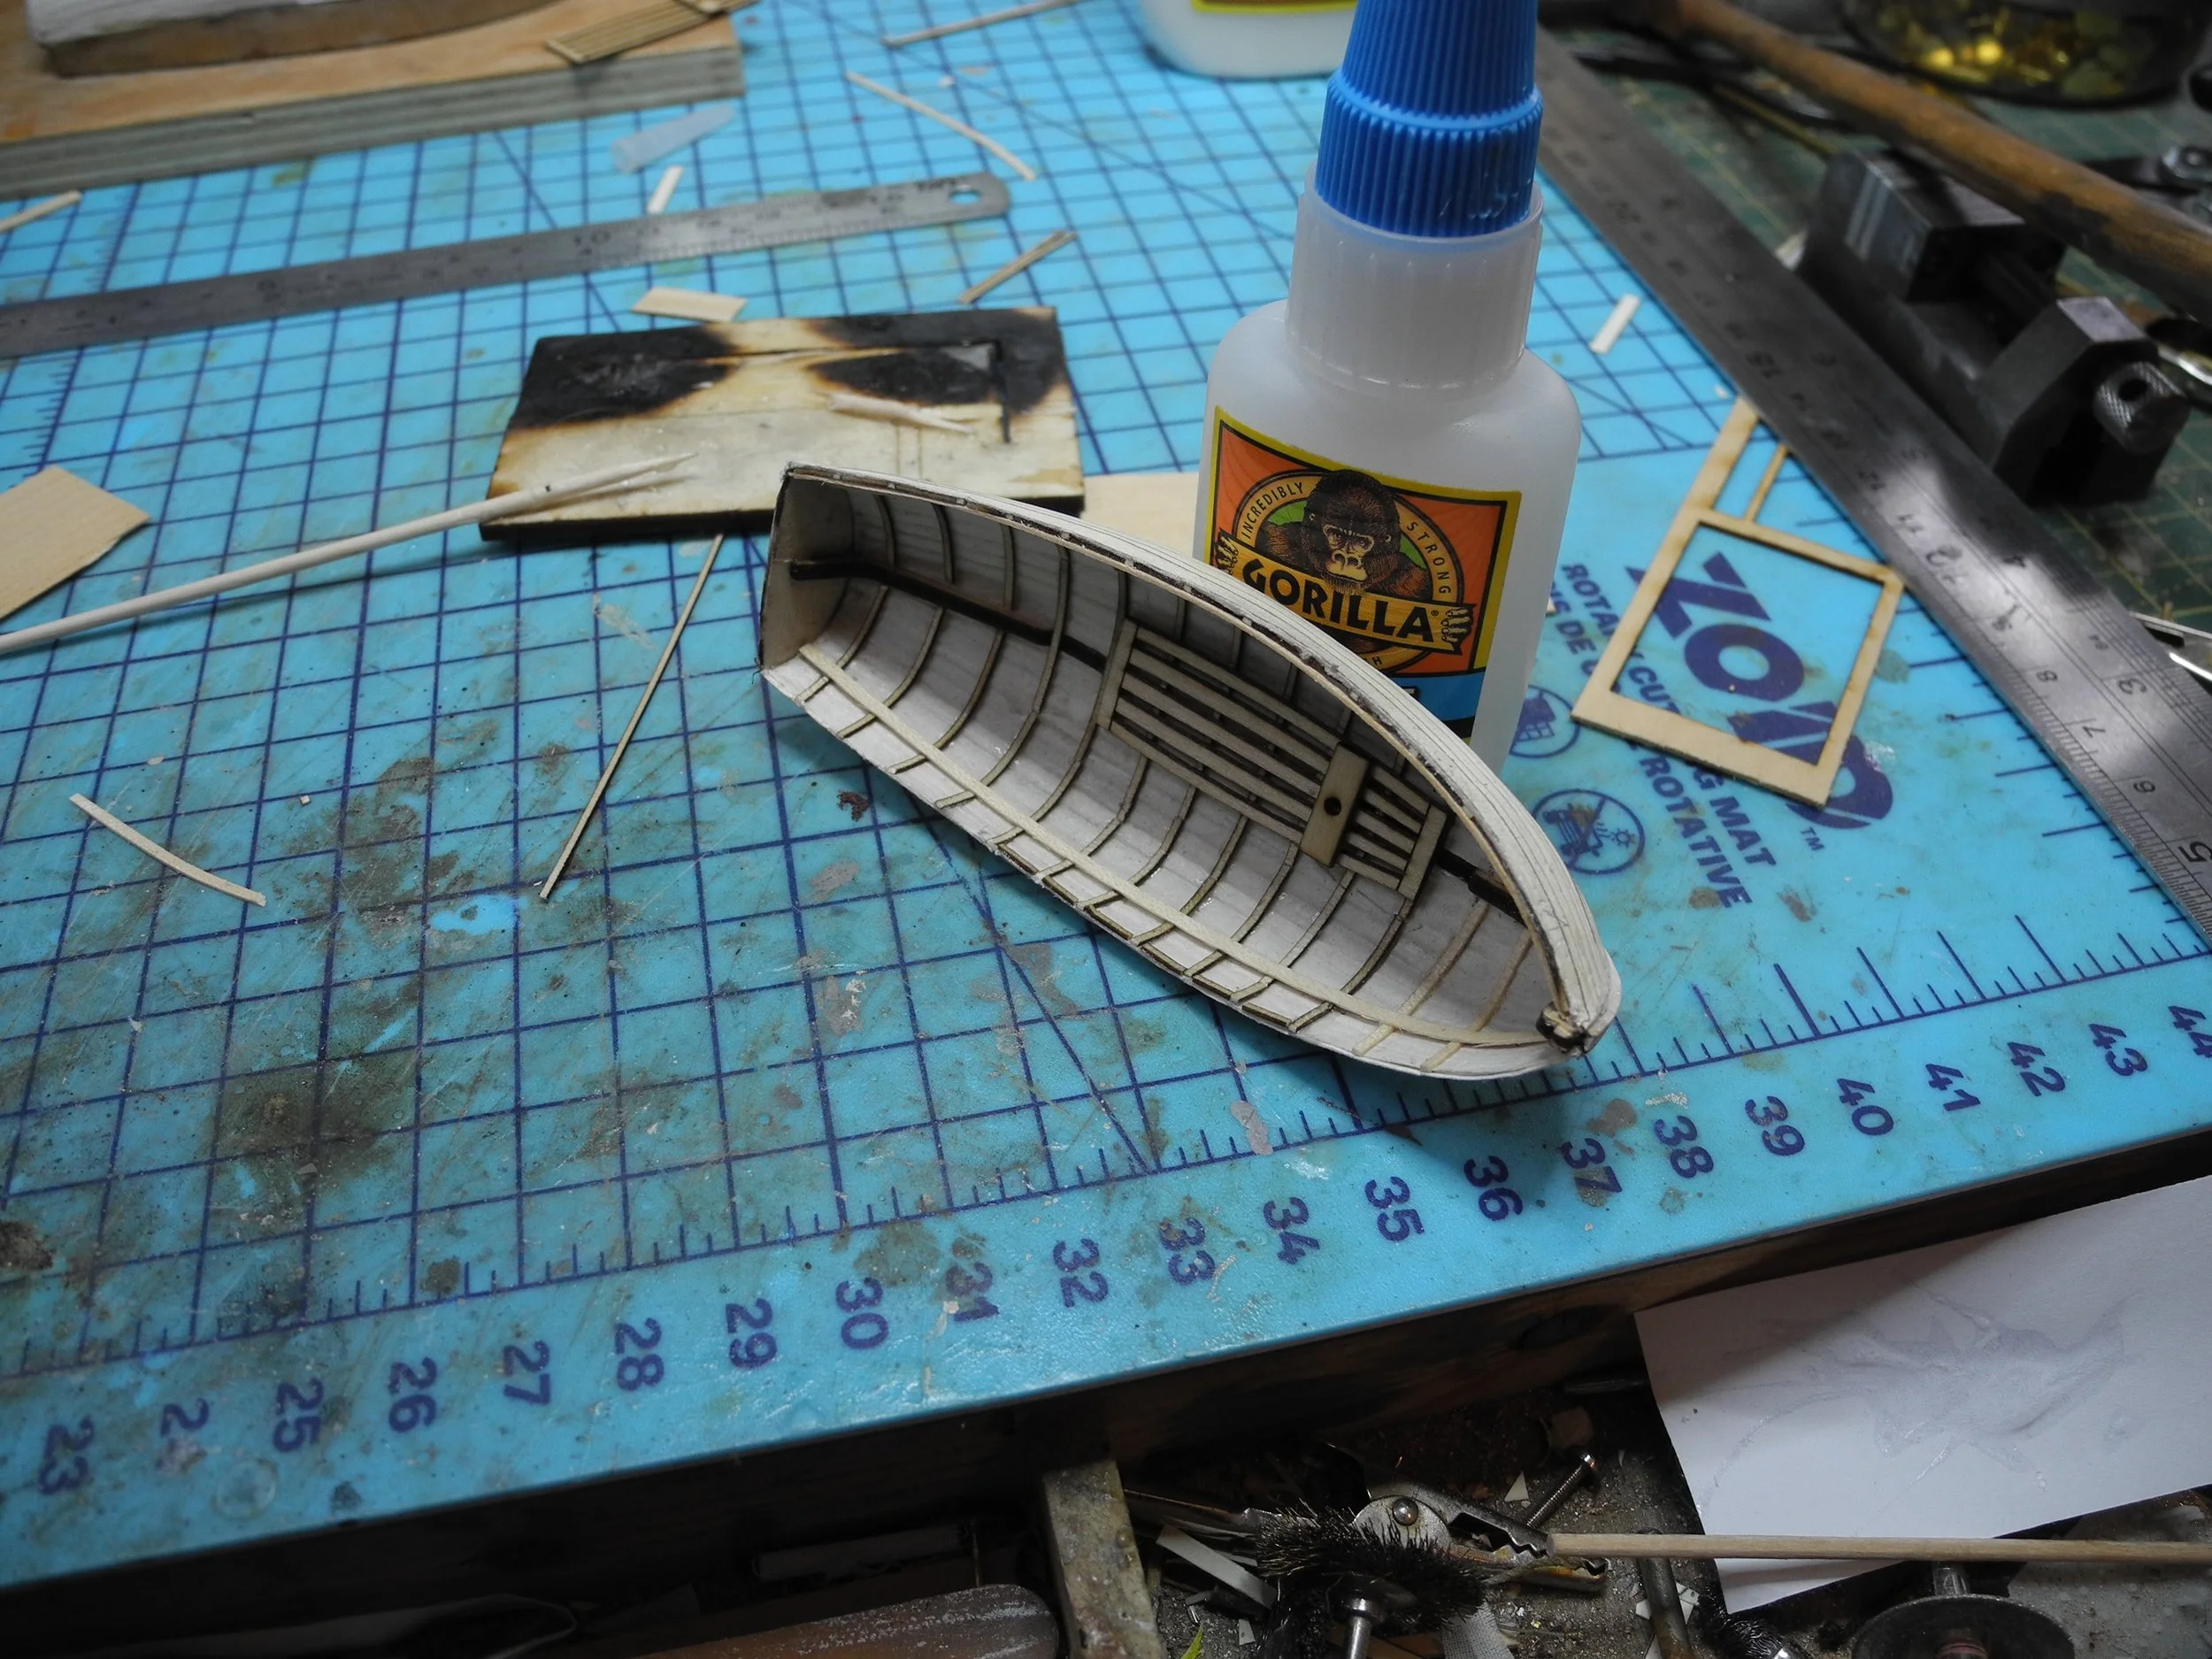
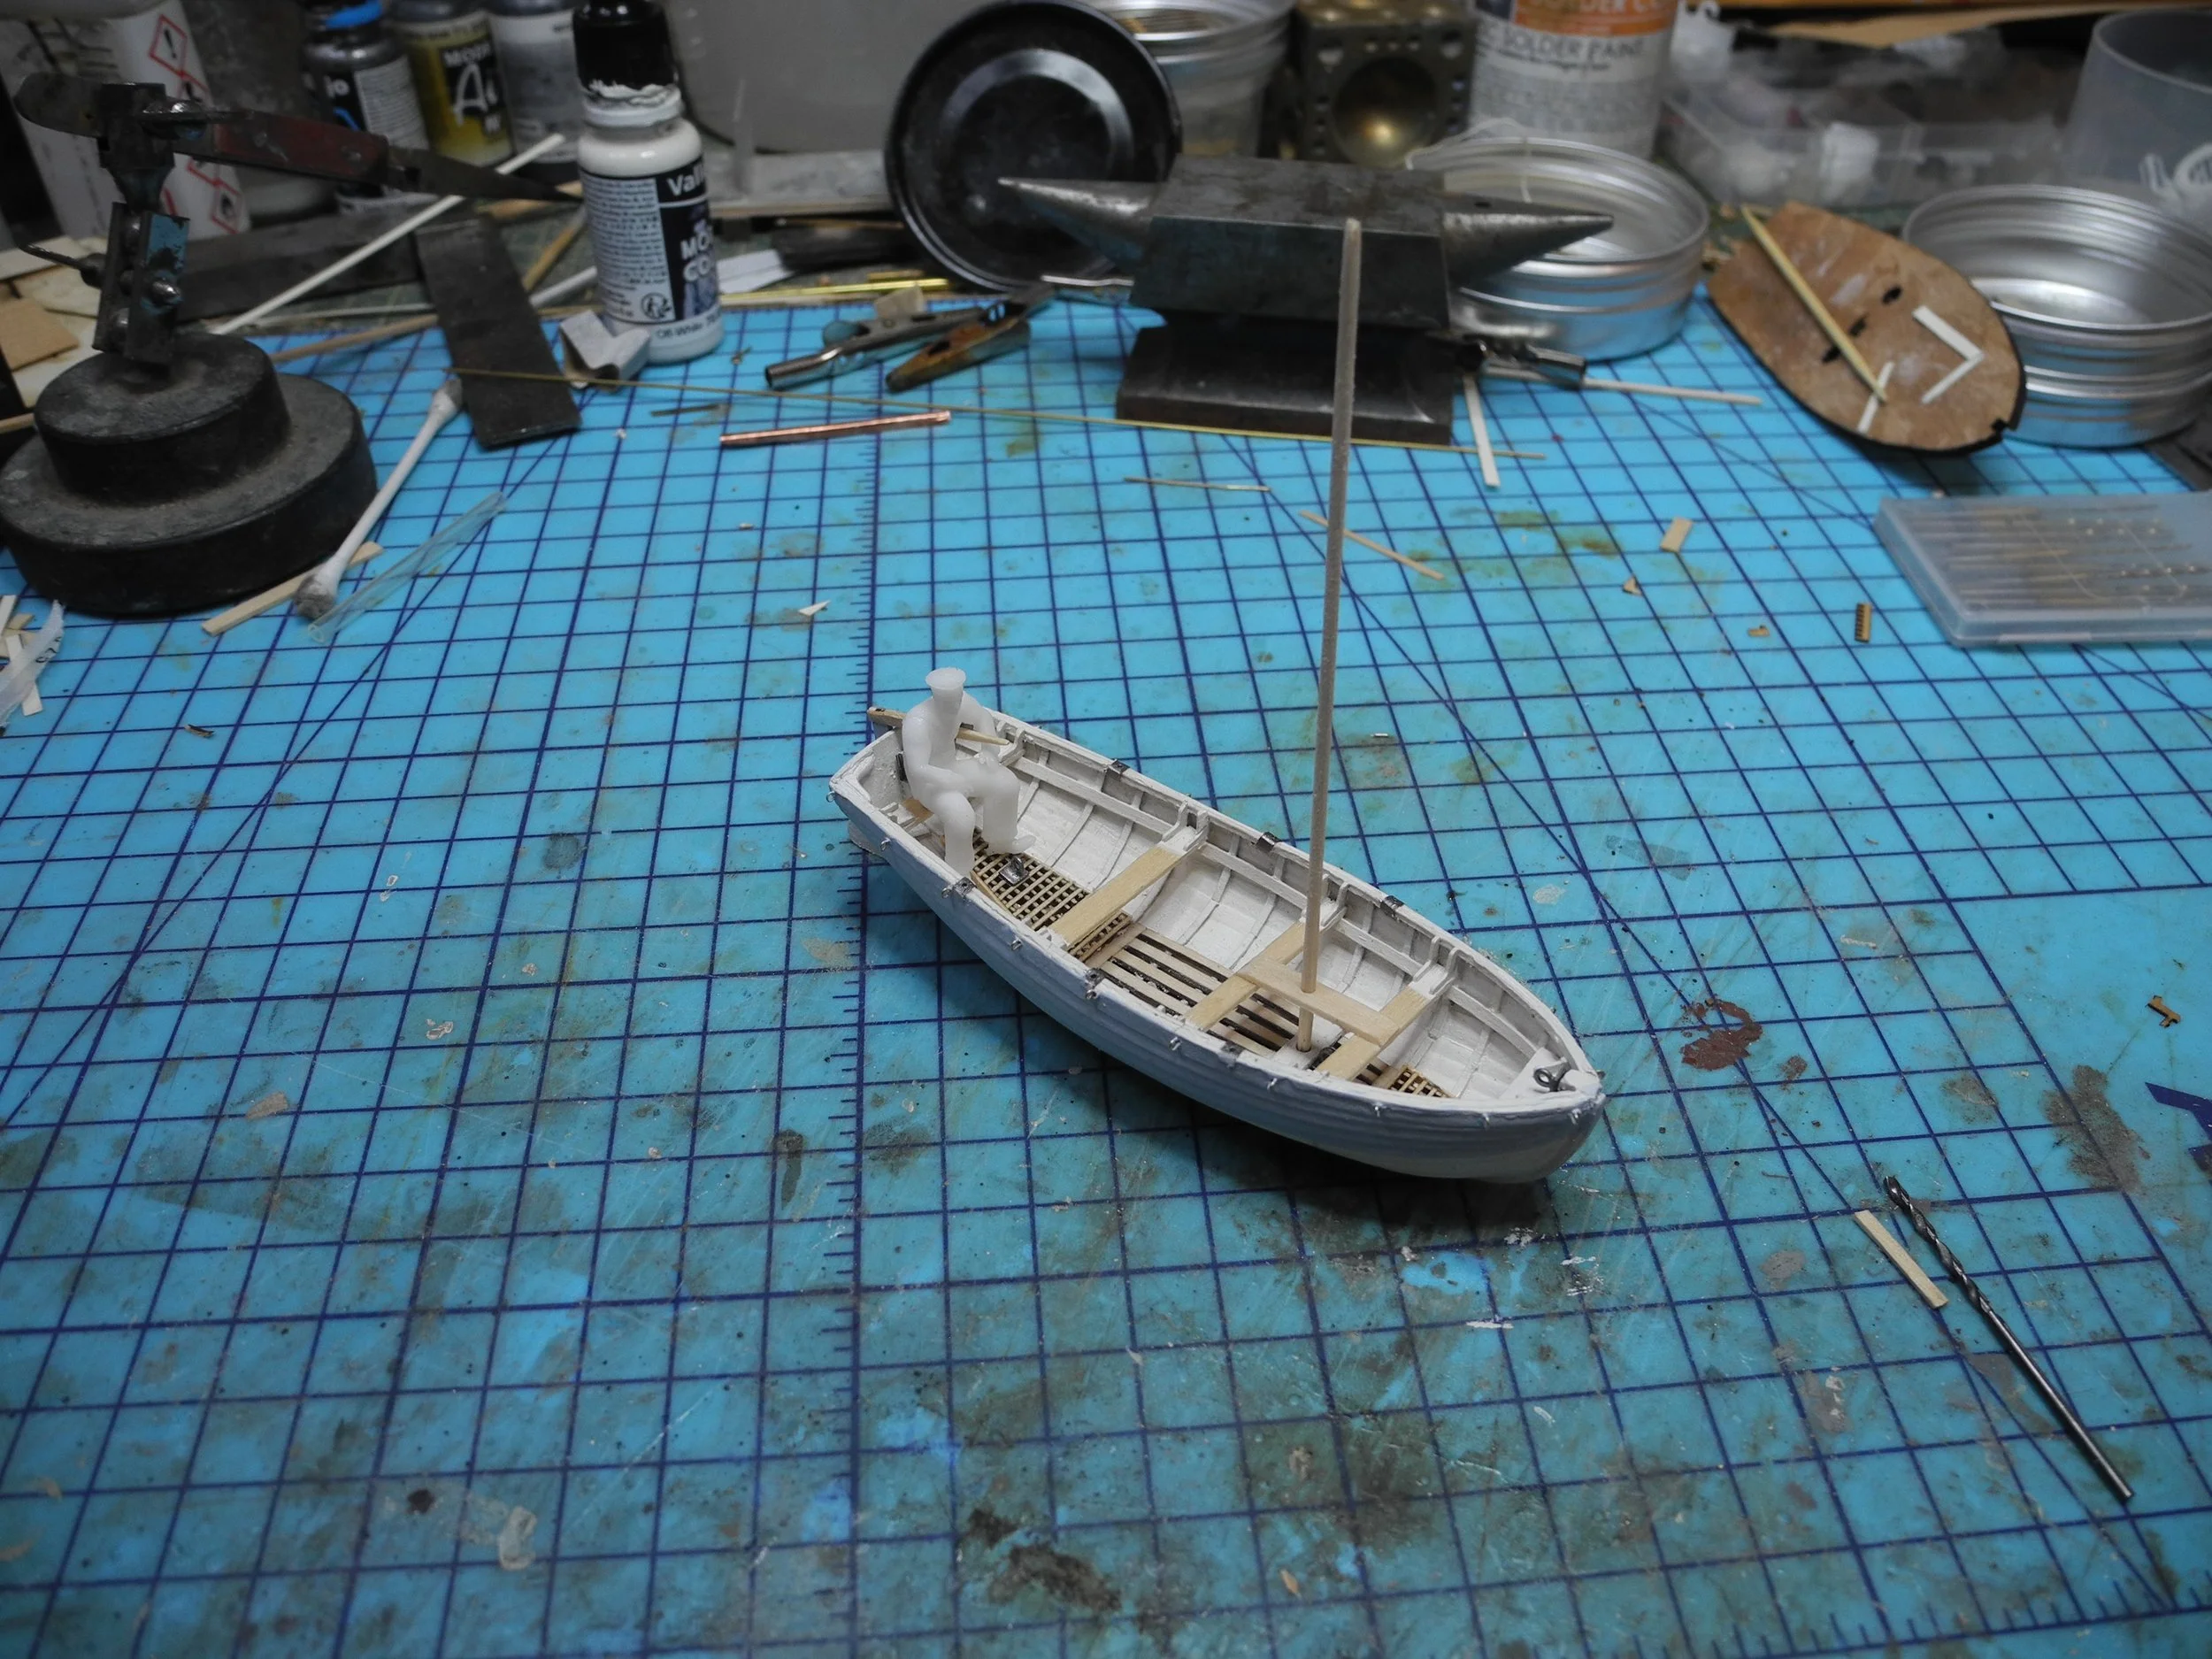
With the ribs, gunwale and shelf added, the shell is very strong. This is a 16ft dinghy at 1:48th scale nearing completion.
Summary
This approach can be used for many types of boat or even model whole vessels (such as motor launches, CMB’s etc) up to 12 or even 15 inches long. Sometimes traditional modelling techniques are very satisfying.